3. Computer Aided Design
This week I worked on image and video compression techniques, and practiced 2D modeling with Inkscape and 3D modeling with Fusion360 for my final project.
Image and Video Compression with GIMP, ImageMagick, and FFmpeg
GIMP for Image Editing and Compression
GIMP is a free, open-source software for advanced image editing, retouching, and graphic design. It provides powerful tools for compressing, resizing, and batch processing images.
Figure 1: GIMP Interface
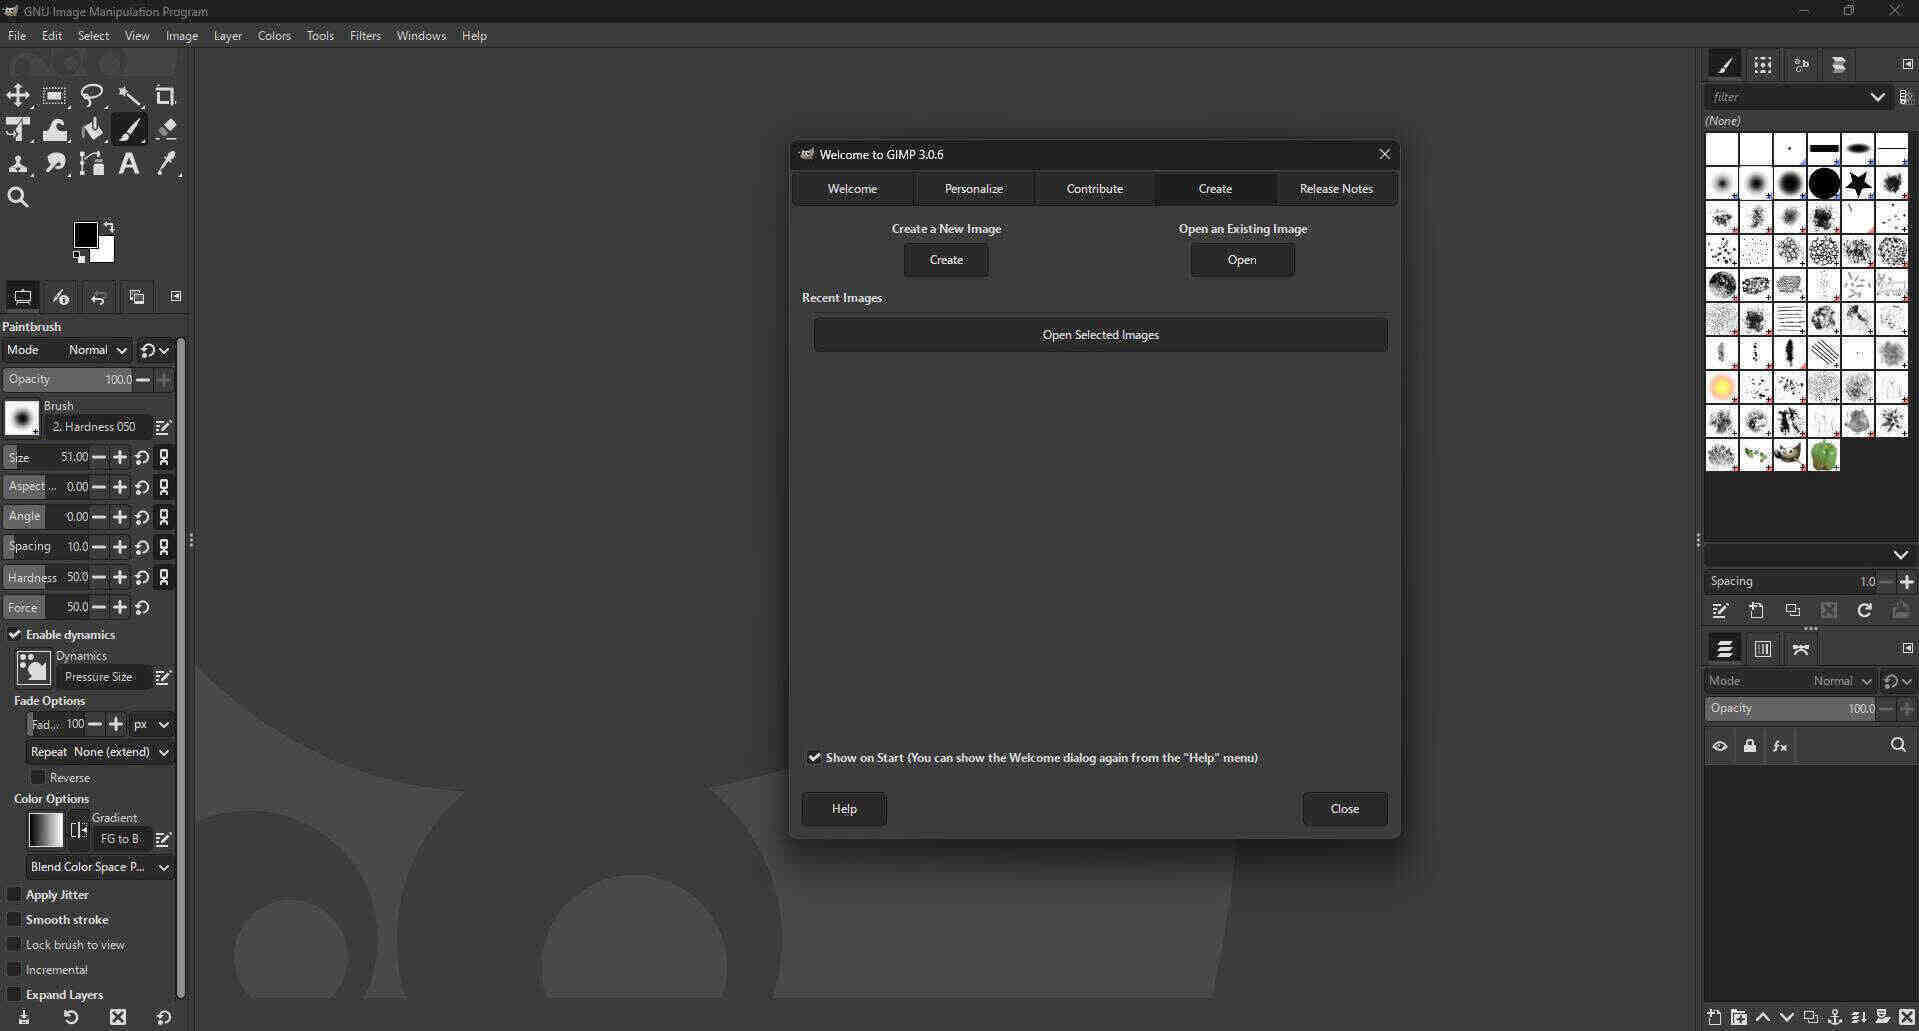
I explored GIMP’s basic drawing tools and experimented with the built-in design elements:
Figure 2: GIMP Drawing Elements
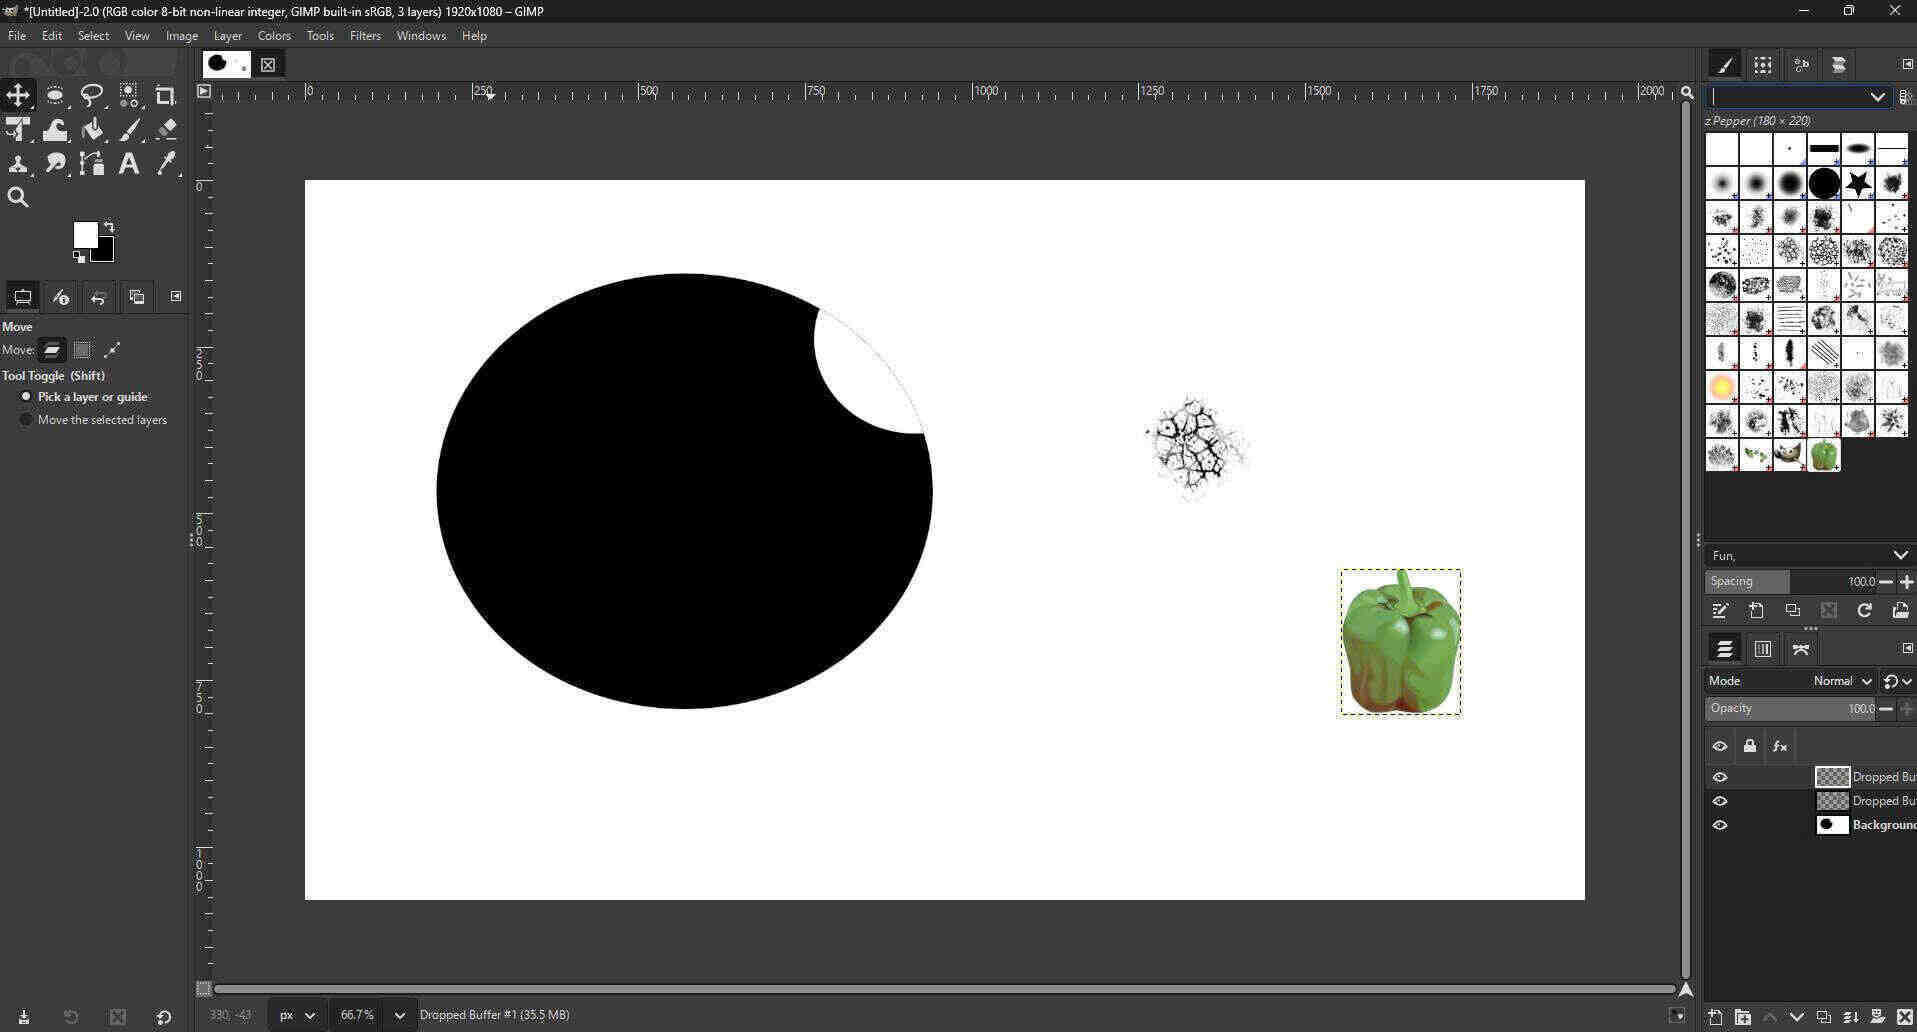
I used GIMP to bring my idea to image that I drawed the first draft of my final project.
Figure 3: First draft of final project
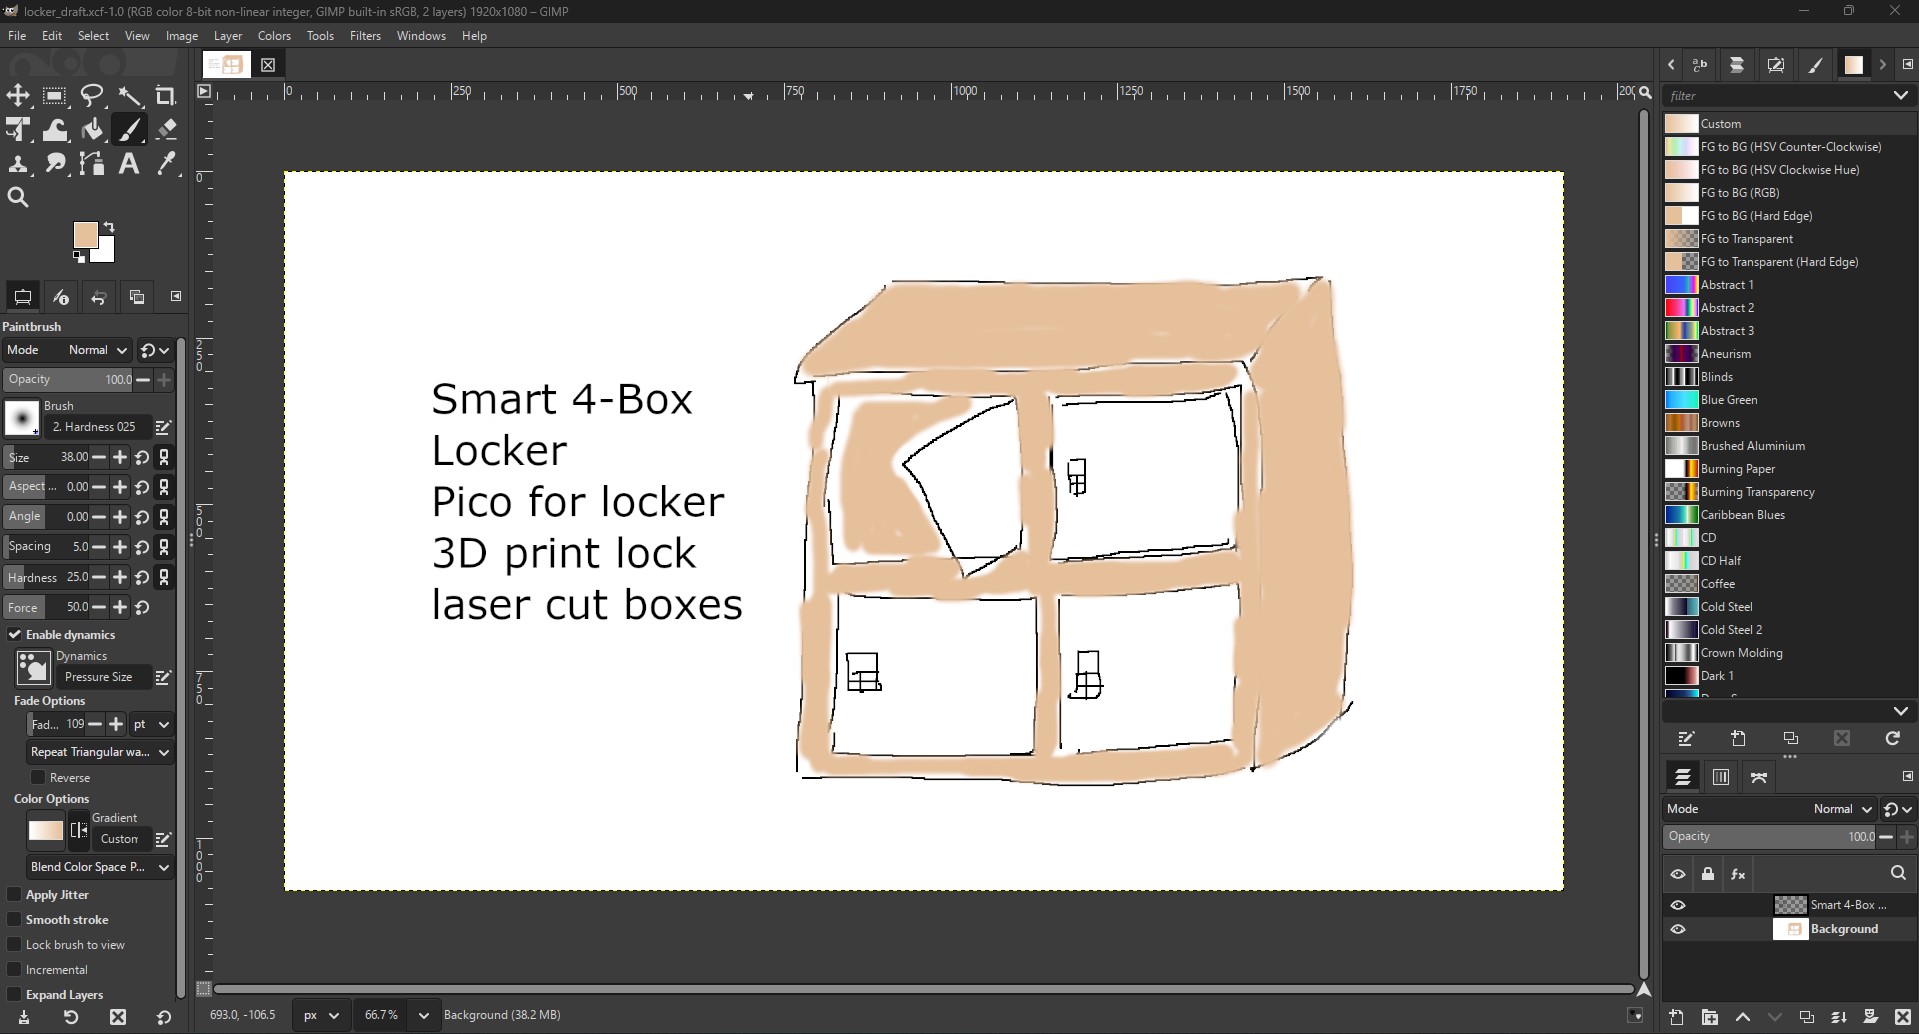
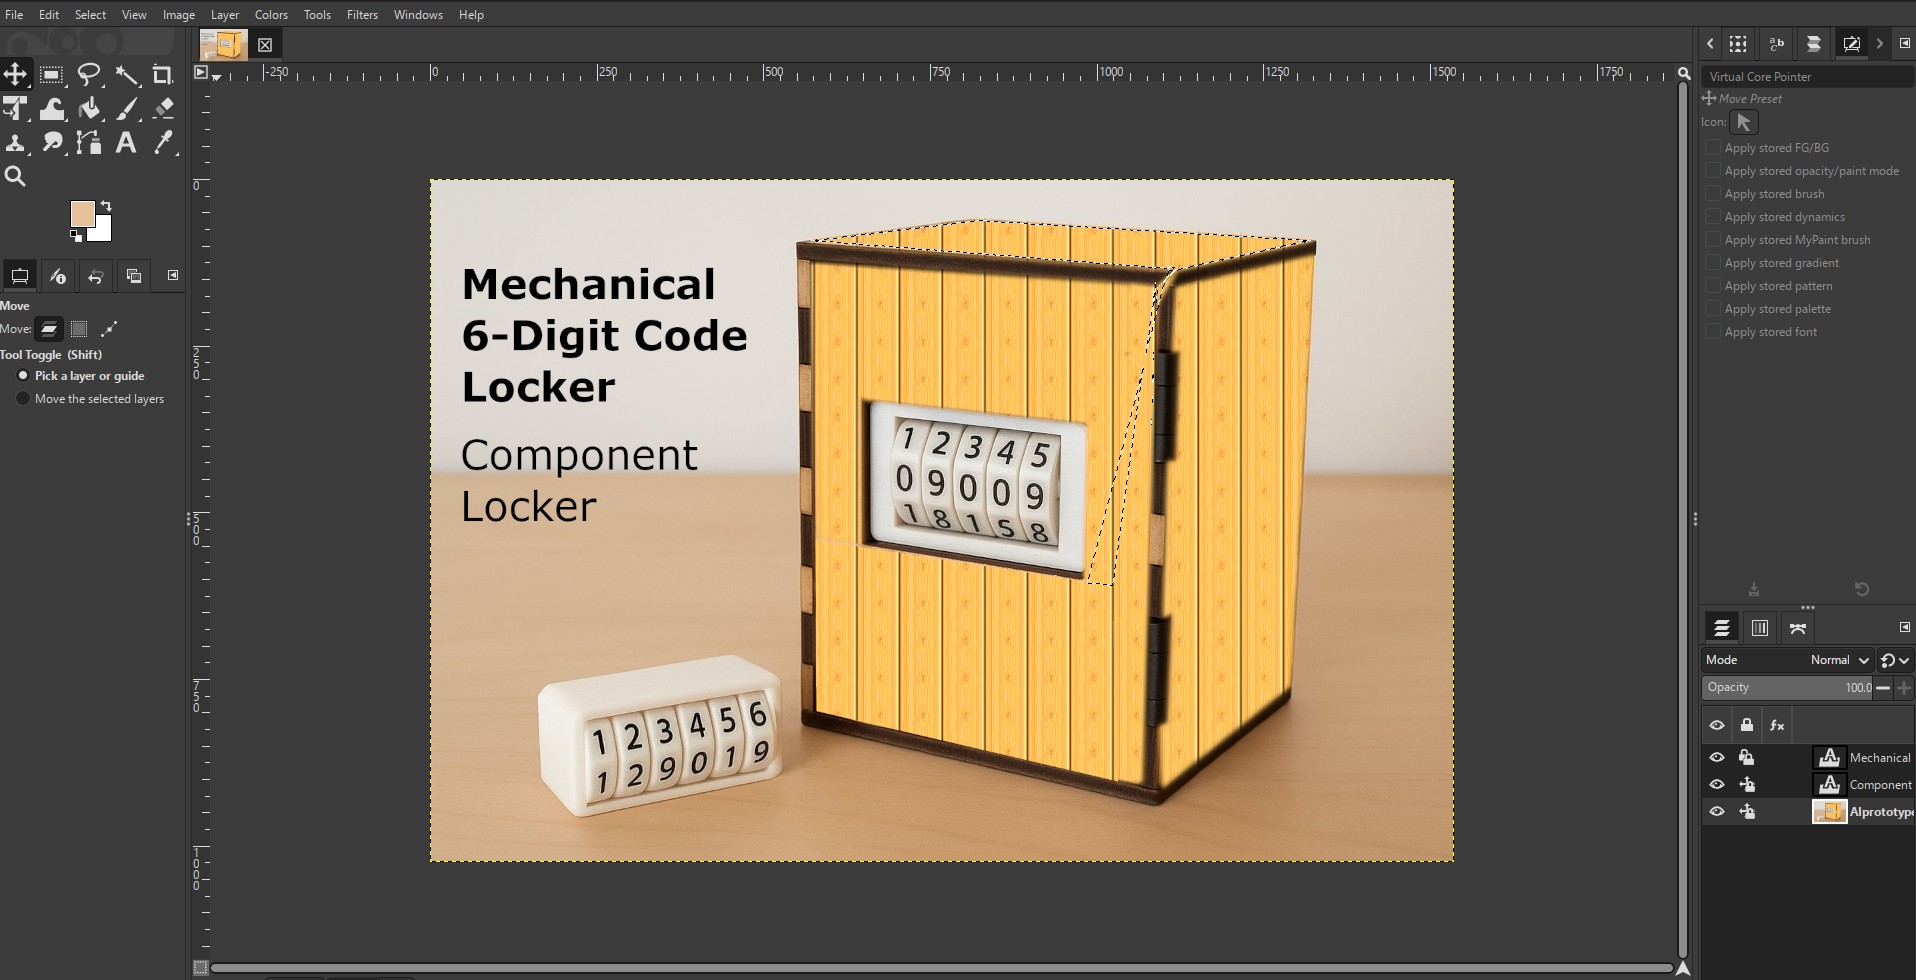
After I used AI to create for me the prototype of my final project. There were something that I want to change on it:
Figure 4: Locker Redesign in GIMP
ImageMagick for Advanced Image Processing
ImageMagick offers comprehensive image processing capabilities beyond basic compression. Click here for more information.
Figure 5: ImageMagick Command Interface
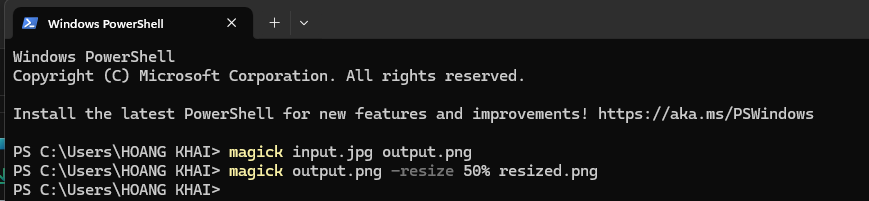
Image Conversion and Compression Comparison
I started by converting image formats and comparing file sizes:
Original to PNG Conversion:
magick input.jpg output.png
Figure 6: Format Conversion
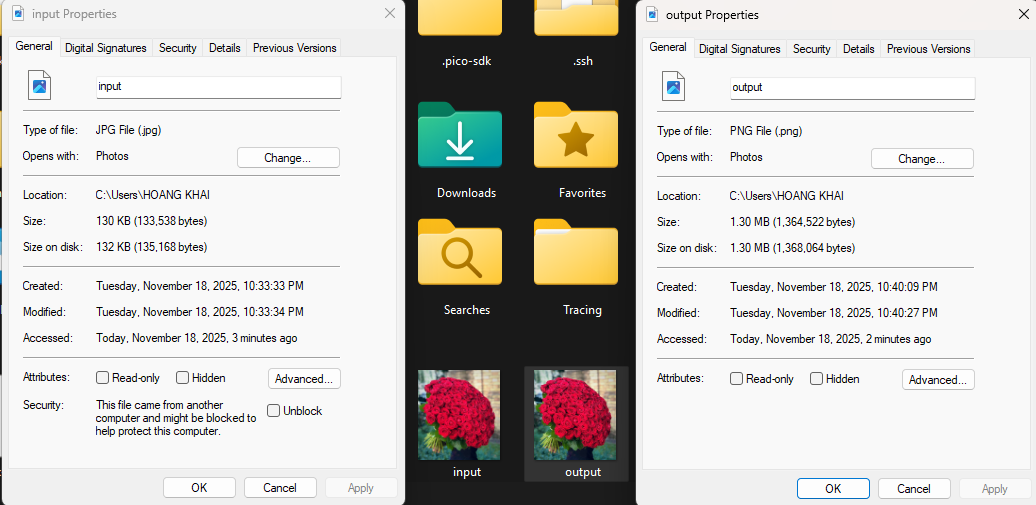
File Size Comparison - Format Conversion:
- Original JPG: 130 KB
- Converted PNG: 1.3 MB (1024% size increase)
The PNG conversion significantly increased file size, demonstrating why format choice matters for web optimization
Resizing Comparison:
magick output.png -resize 50% resized.png
Figure 7: Image Resizing
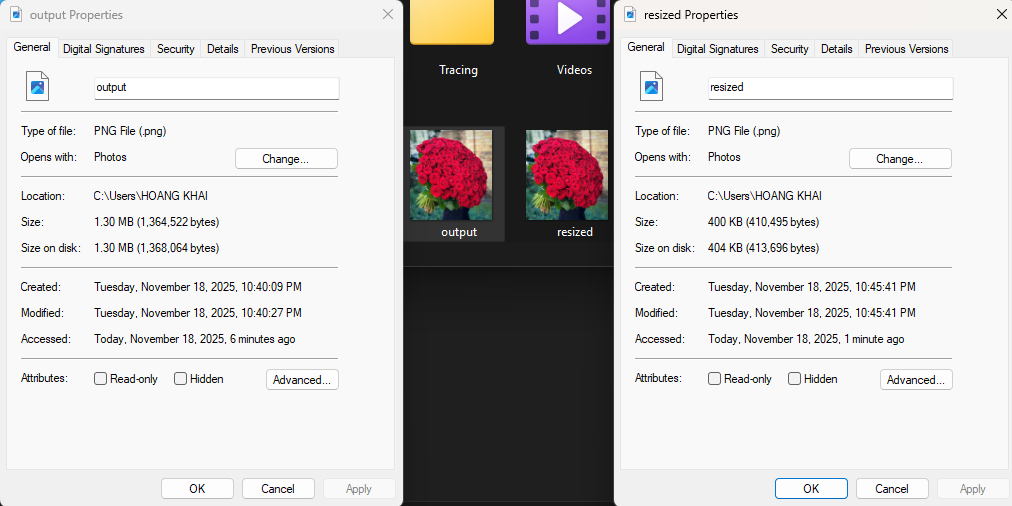
File Size Comparison - Resizing:
- Original PNG: 1.3 MB
- Resized PNG (50%): 400 KB (30.1% size reduction)
Screenshot Optimization: The documentation screenshots I captured were around 200KB each, which is too large for web pages. Through ImageMagick, I optimized them:
Before Optimization:
- Screenshot 1: 215 KB
- Screenshot 2: 198 KB
After Optimization:
magick screenshot.png -quality 85 -strip optimized.jpg
- Optimized JPG: 45-65 KB (70-75% reduction)
FFmpeg for Video Compression
Original Video Analysis
First, I examined the original video properties:
Figure 8: Video Information Check
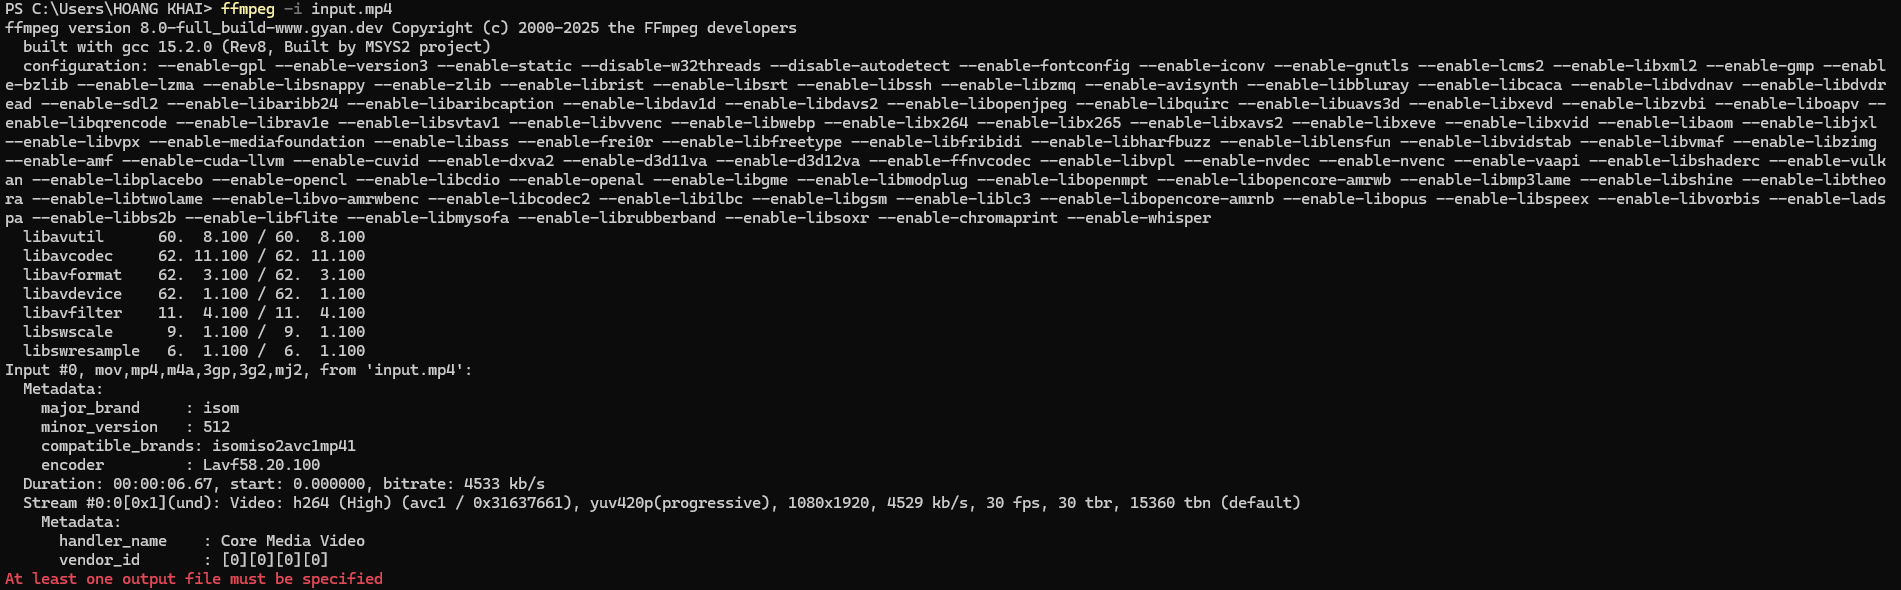
Original Video Specifications:
- Format: MP4
- Resolution: 1080x1920
- File Size: 3.6 MB
- Duration: 0:07 s
- Bitrate: 4529 kbps
Compression Methods and Results
I applied multiple compression techniques and compared the results:
1. Quality Reduction (CRF Method)
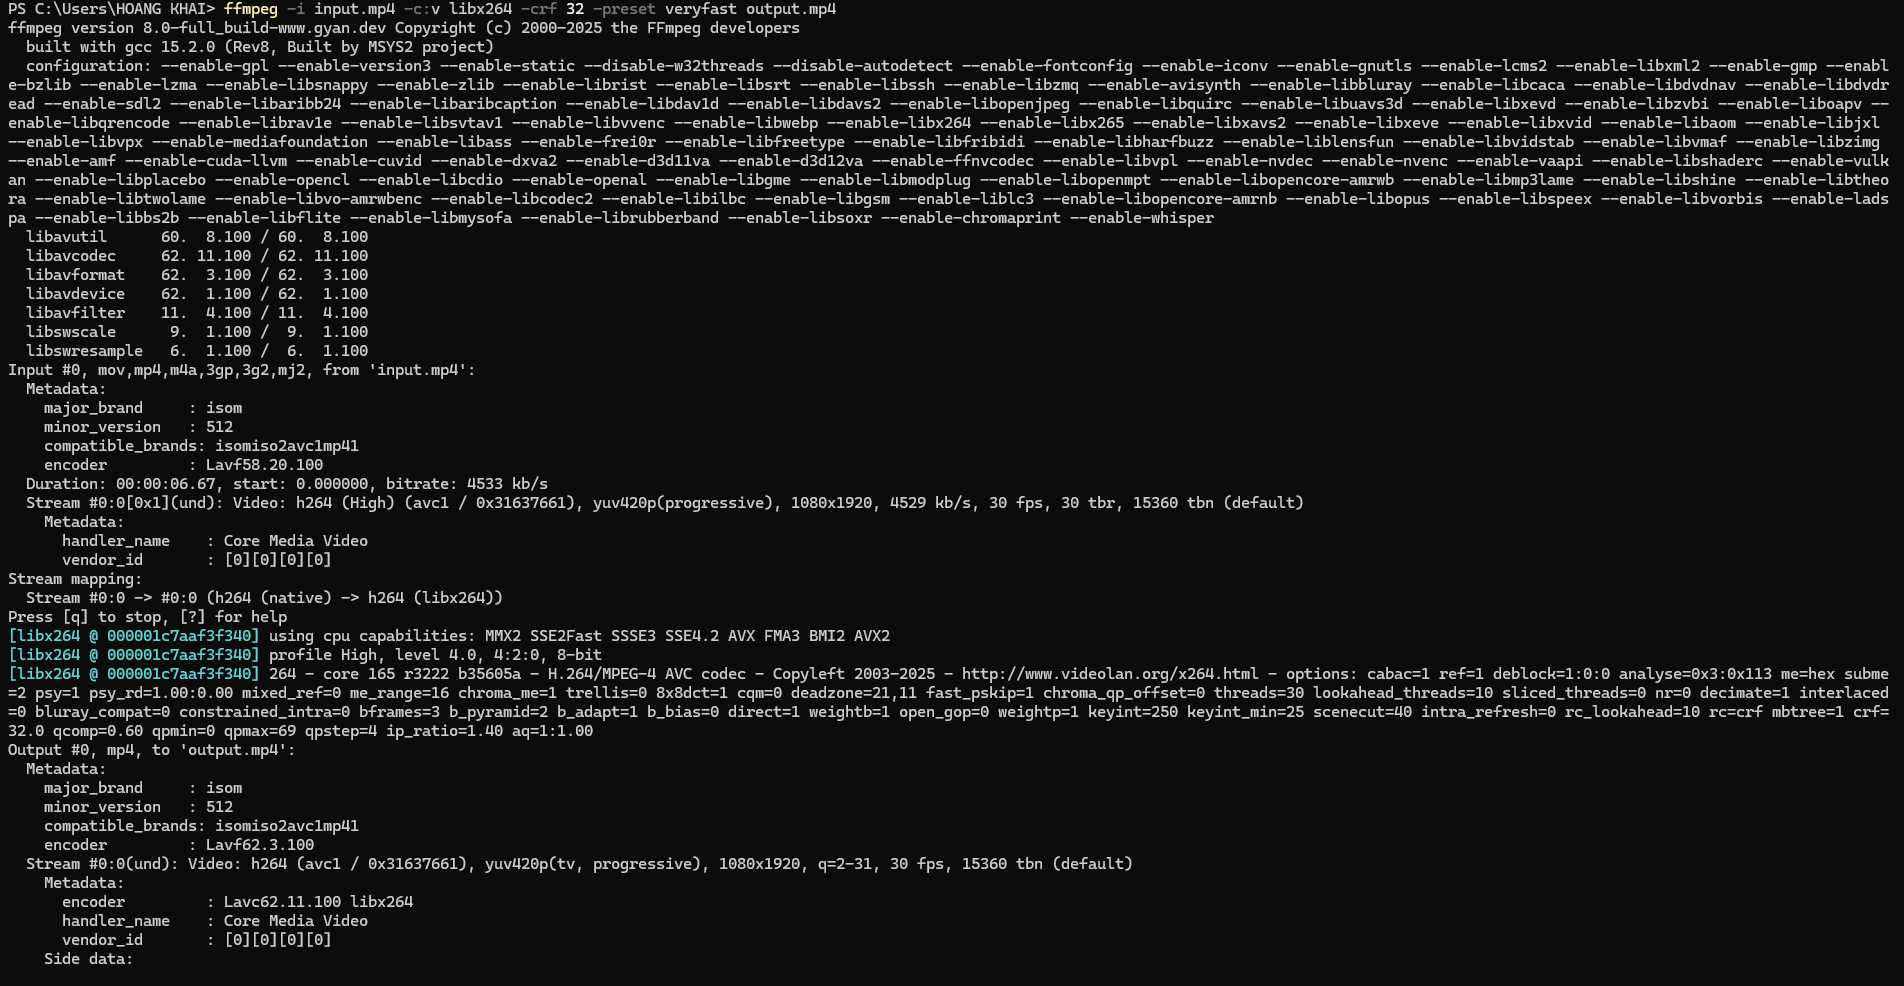
ffmpeg -i input.mp4 -c:v libx264 -crf 26 -preset fast output.mp4
2. Resolution Reduction
ffmpeg -i input.mp4 -vf "scale=854:480" -c:v libx264 -crf 23 output_480p.mp4
3. Frame Rate Reduction
ffmpeg -i input.mp4 -r 24 -c:v libx264 -crf 23 output_24fps.mp4
4. Audio Quality Reduction
ffmpeg -i input.mp4 -c:v libx264 -crf 23 -ac 1 output.mp4
Figure 9: Compression Process
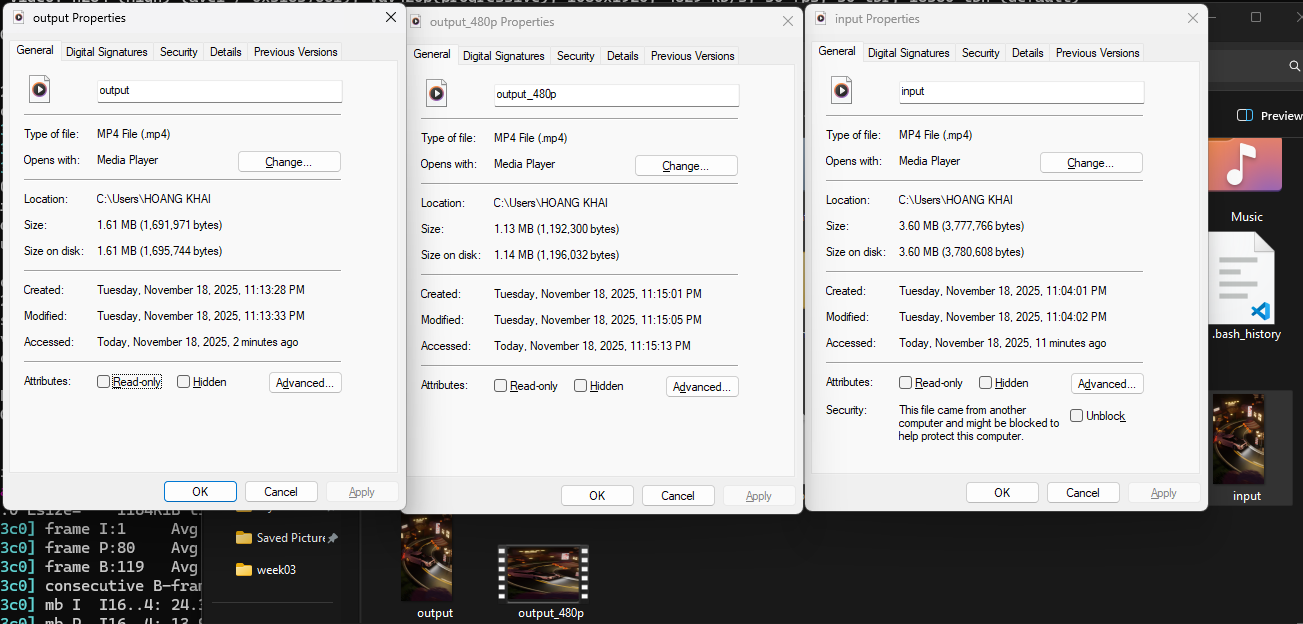
Video Size Comparison Results:
| Method | Output Size | Reduction | Quality Assessment |
|---|---|---|---|
| Original | 3.6 MB | - | High quality |
| CRF 32 | 1.61 MB | 44.7% | Very good |
| 480p Resolution | 1.13 MB | 54.5% | Good |
| 24 FPS | 0.93 MB | 67.6% | Good |
| Mono Audio | 1.08 MB | 63.2% | Very good |
Figure 10: Compressed Video Output
2D Design with Inkscape
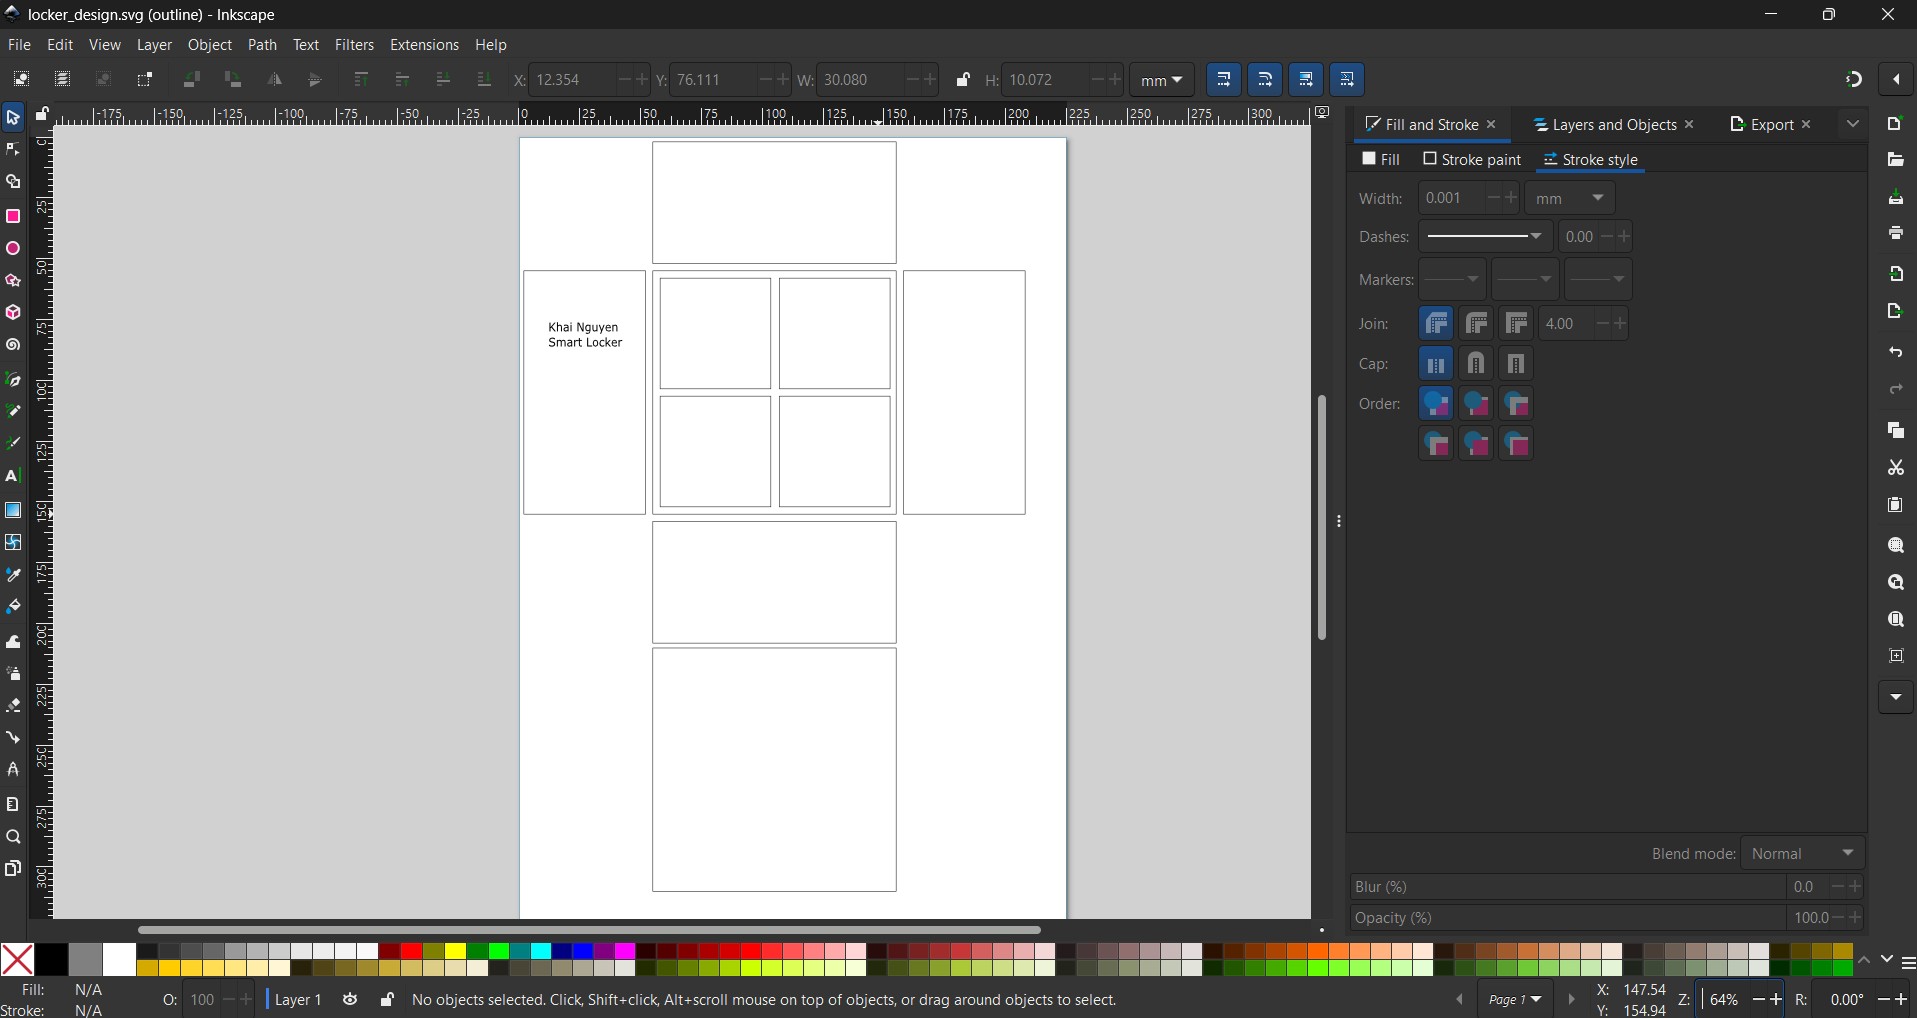
For 2D design, I used Inkscape to create vector graphics for my final project. I can design a 2D laser cut for the boxes parts.
Design Process:
- Create squares and rectangles that cover 6 sides of my locker
- Change the length and width of the shapes based on the design using W: and H: on top of the paper
- Adjust the position of the shapes on the x y axis to make them reasonable.
- Add some design for the laser to cut also
Figure 11: First sketch of Smart Locker
3D Design with Fusion360
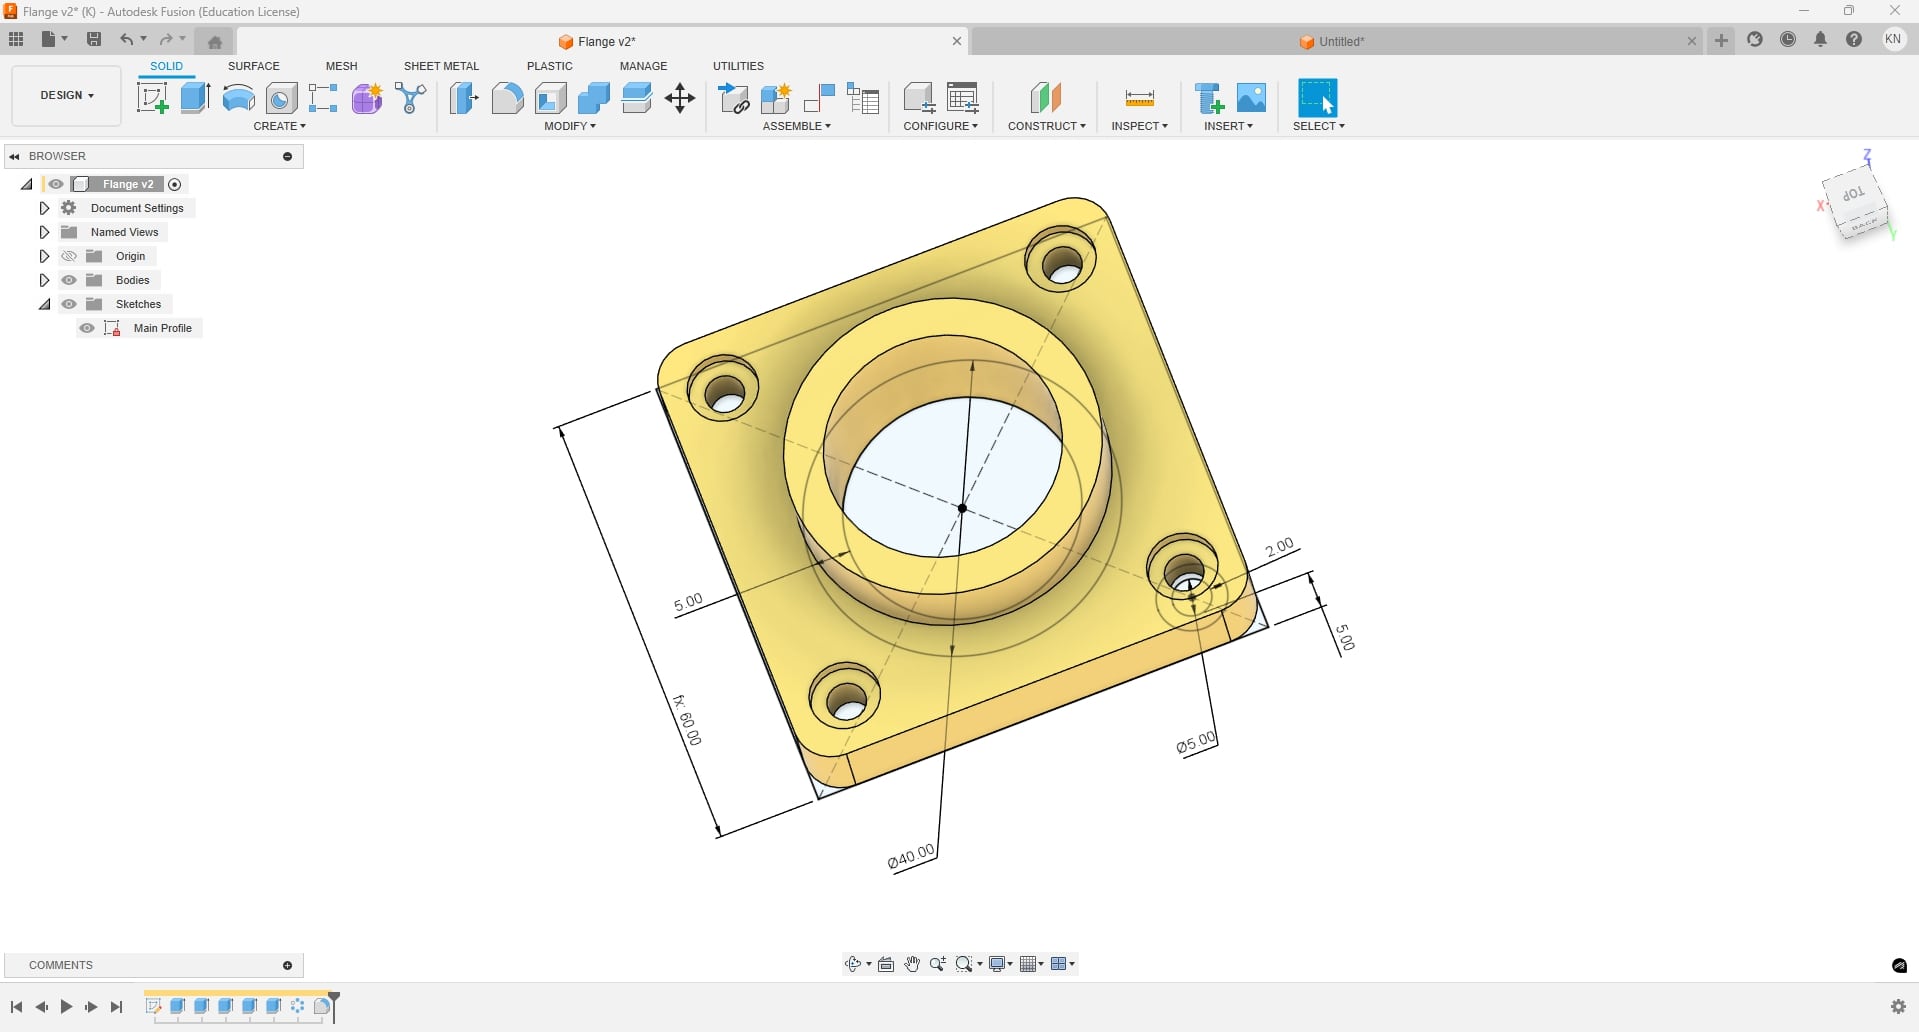
Practice Exercise: Flange Design
I began with the tutorial exercise to design a flange, which helped me understand Fusion360’s sketching and modeling workflow:
Figure 12: Flange Design Practice
Final Project Component: Door Hinge
For my final project, I designed a custom door hinge mechanism. Building on the professor’s example, I developed additional features specific to my project requirements:
Figure 11: Custom Door Hinge Design
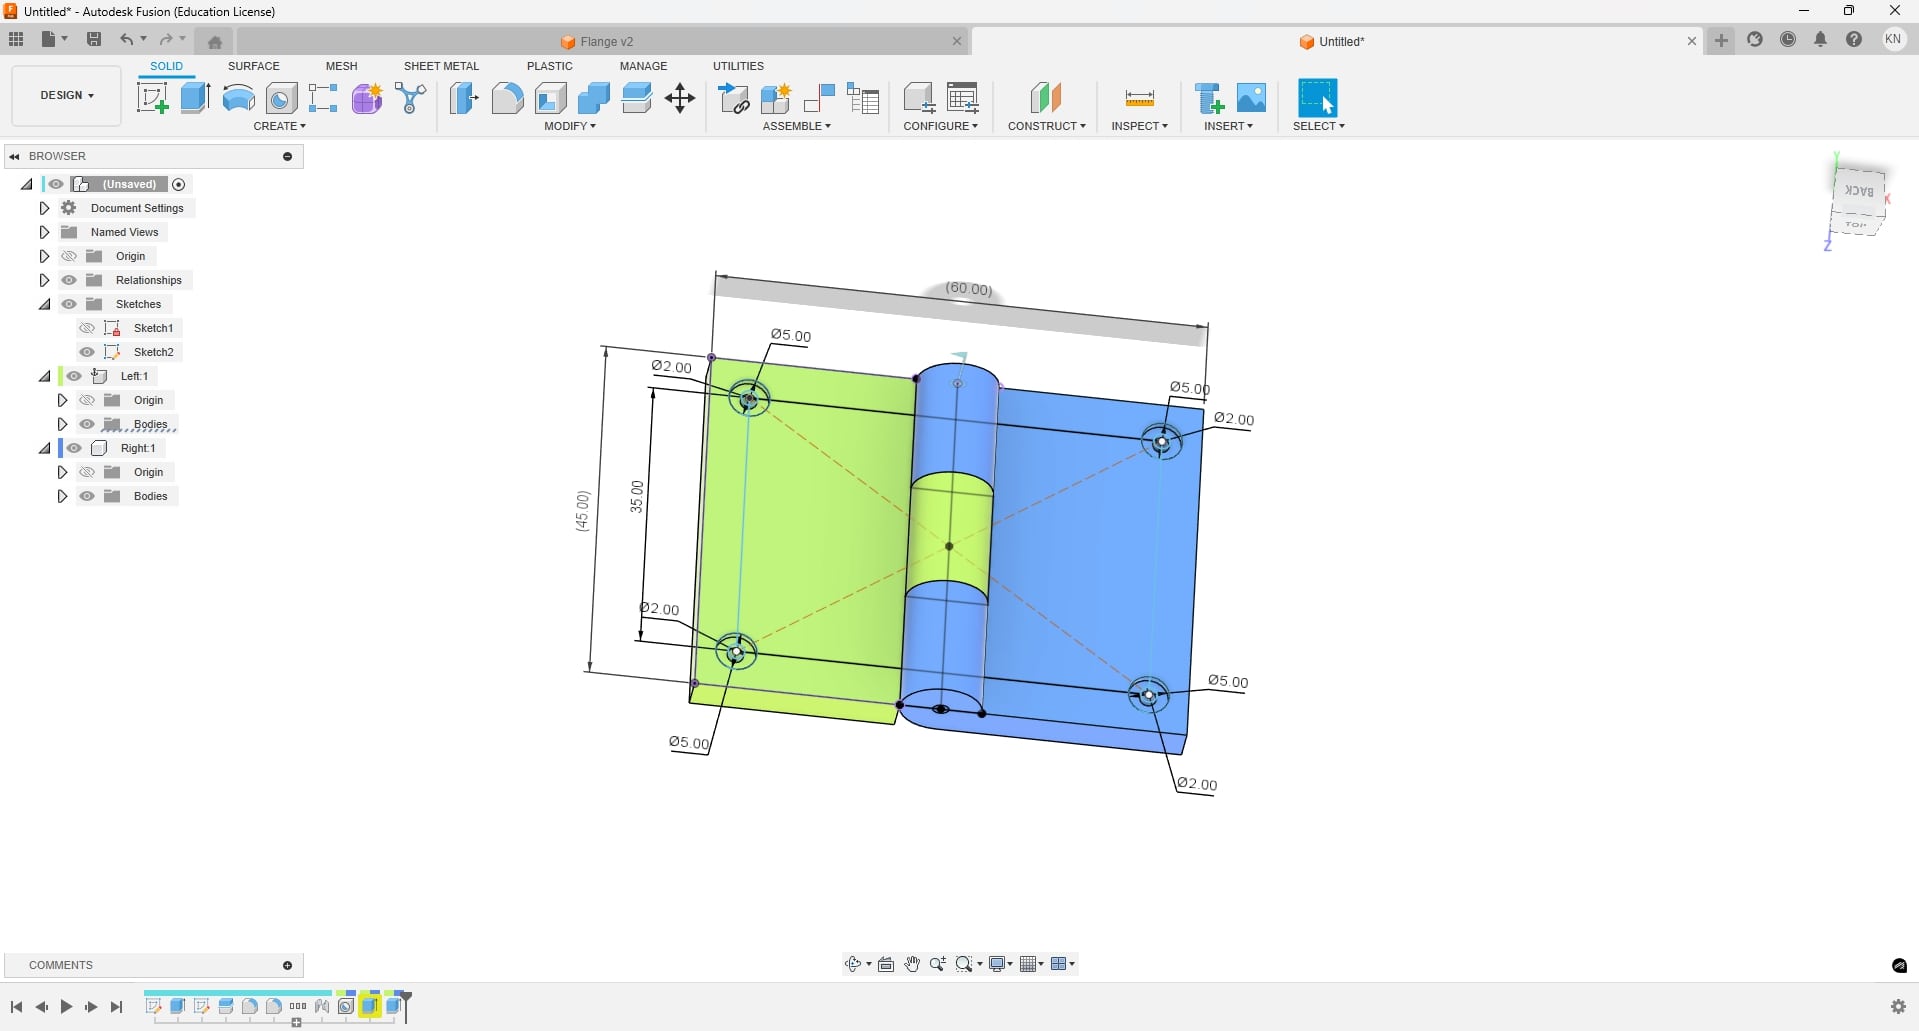
Design Stages Documentation:
- Initial Sketching - Created 2D profiles for hinge components
- Parametric Dimensions - Applied constraints and measurements
- 3D Extrusion - Converted sketches to 3D bodies
- Assembly Creation - Made components and applied joints
- Motion Testing - Verified hinge movement and clearance
Final Project 3D Design: 4-Box
Figure 12: First design of final project
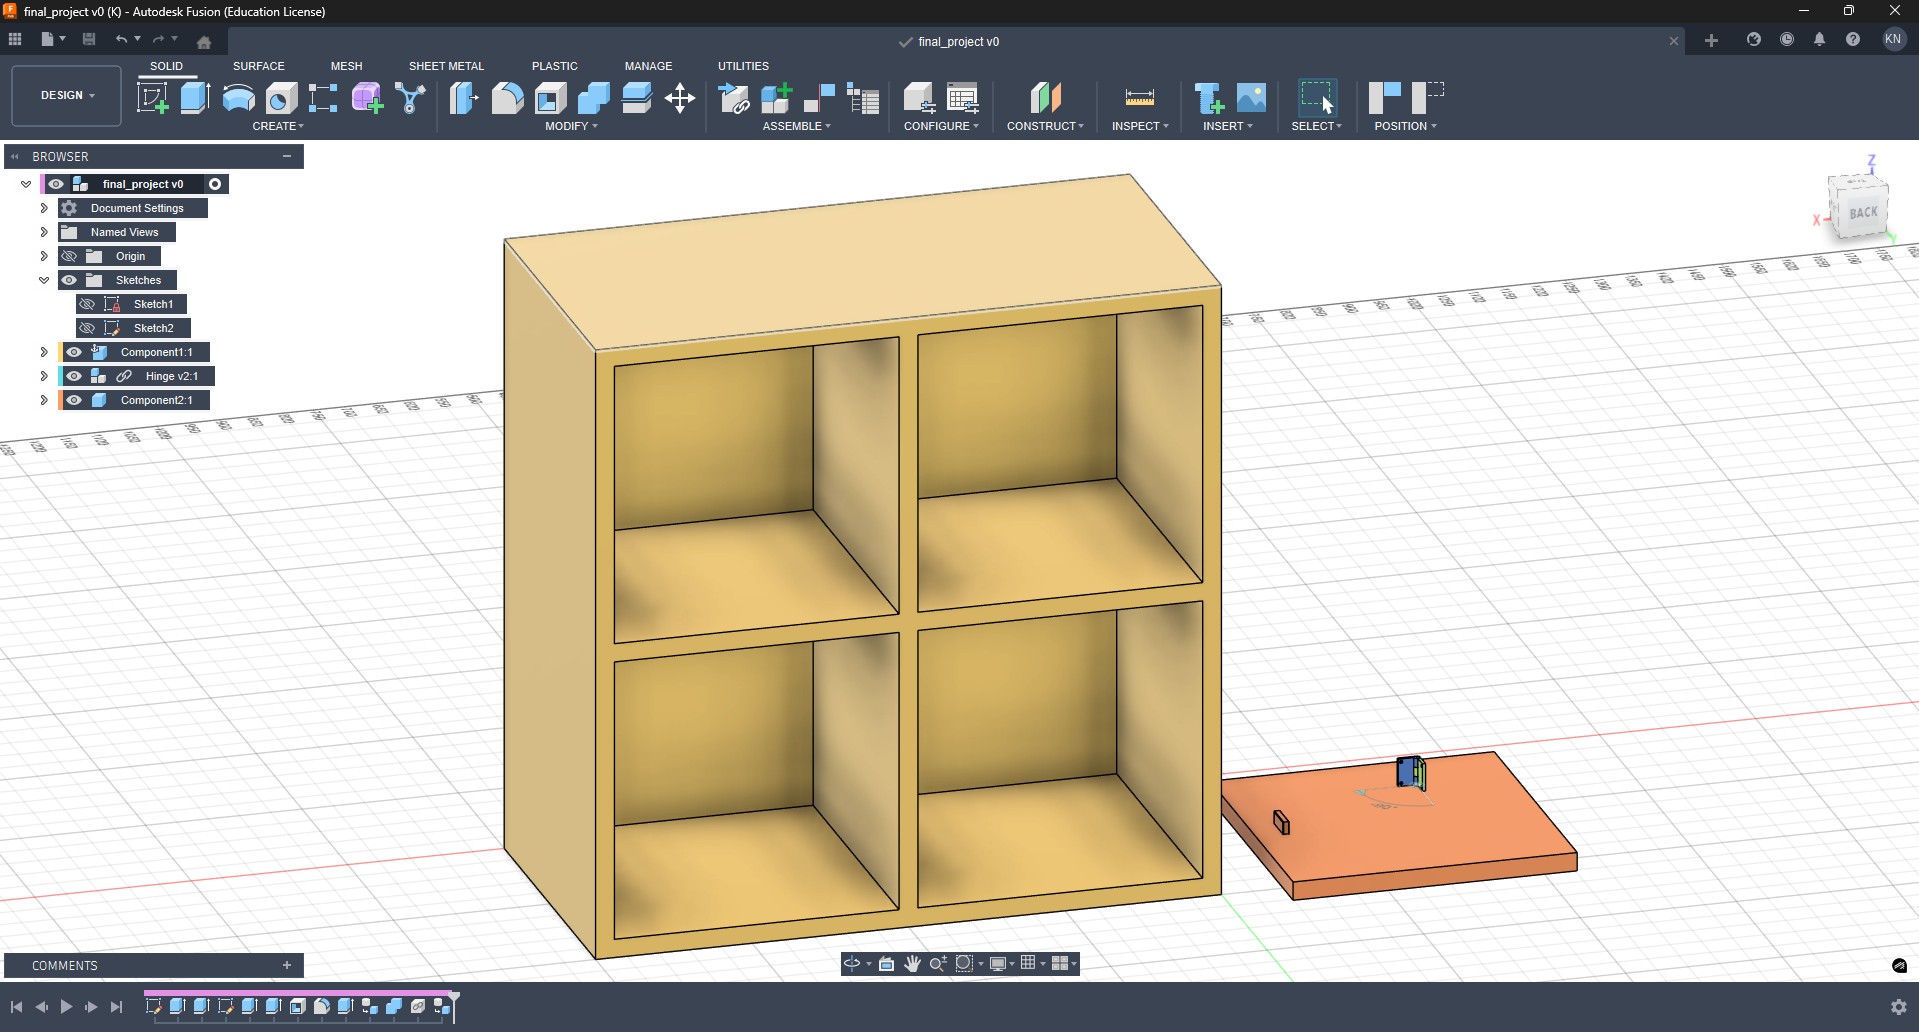
- Add Parameter - For outside, boxes, and space between boxes
- Sketching - For boxes, and doors, also door handles
- 3D Extrusion - Converted sketches to 3D bodies
- Add Hinge - Link from previous Hinge file
- Motion Testing - Verified hinge, doors movement and clearance
Software Evaluation
GIMP
Why I Chose It: GIMP provides professional-grade image editing capabilities for free. It’s essential for creating and optimizing graphical elements for my final project’s user interface.
Alternatives Considered: Photoshop (expensive), Paint.NET (limited features), Krita (more focused on digital painting)
Inkscape
Why I Chose It: As a vector graphics editor, Inkscape excels at creating scalable designs for laser cutting and 2D profiling needed in my project.
Alternatives Considered: Adobe Illustrator (costly), CorelDRAW (expensive), LibreOffice Draw (basic features)
Fusion360
Why I Chose It: Fusion360 offers professional parametric 3D modeling with free educational licensing. Its integration with CAM and simulation tools makes it ideal for my mechanical design needs.
Alternatives Considered: SolidWorks (expensive), FreeCAD (less polished), Tinkercad (too basic)
Design Files
All design files have been committed to my repository and are accessible through the following links:

This comprehensive CAD experience has provided me with the essential skills needed to develop both the structural and visual components of my final project efficiently.