14. Networking and communications
I have used deepseek to help me with the documentation and the code for external based on what I already did on the previous weeks. Deepseek
Group Assignment
In my team, we used 3 ESP32-C3 microcontrollers to demonstrate ESP-NOW protocol communication. We configured one device as the master and two devices as slaves. The master ESP32-C3 broadcasts messages to both slave devices simultaneously using ESP-NOW’s peer-to-peer architecture.
This setup demonstrates: - Direct device-to-device communication without WiFi router - Low-latency wireless messaging using MAC address routing - One-to-many topology where a single sender reaches multiple receivers
Individual Assignment
Objective
This week, I established Bluetooth Low Energy (BLE) communication between my ESP32-C3 microcontroller and my smartphone. The goal was to wirelessly control an LED on the ESP32-C3 using a BLE scanner app on my phone.
Communication Flow:
| Direction | Data | Purpose |
|---|---|---|
| Phone → ESP32 | “1” | Turn LED ON |
| Phone → ESP32 | “0” | Turn LED OFF |
Setup
Hardware
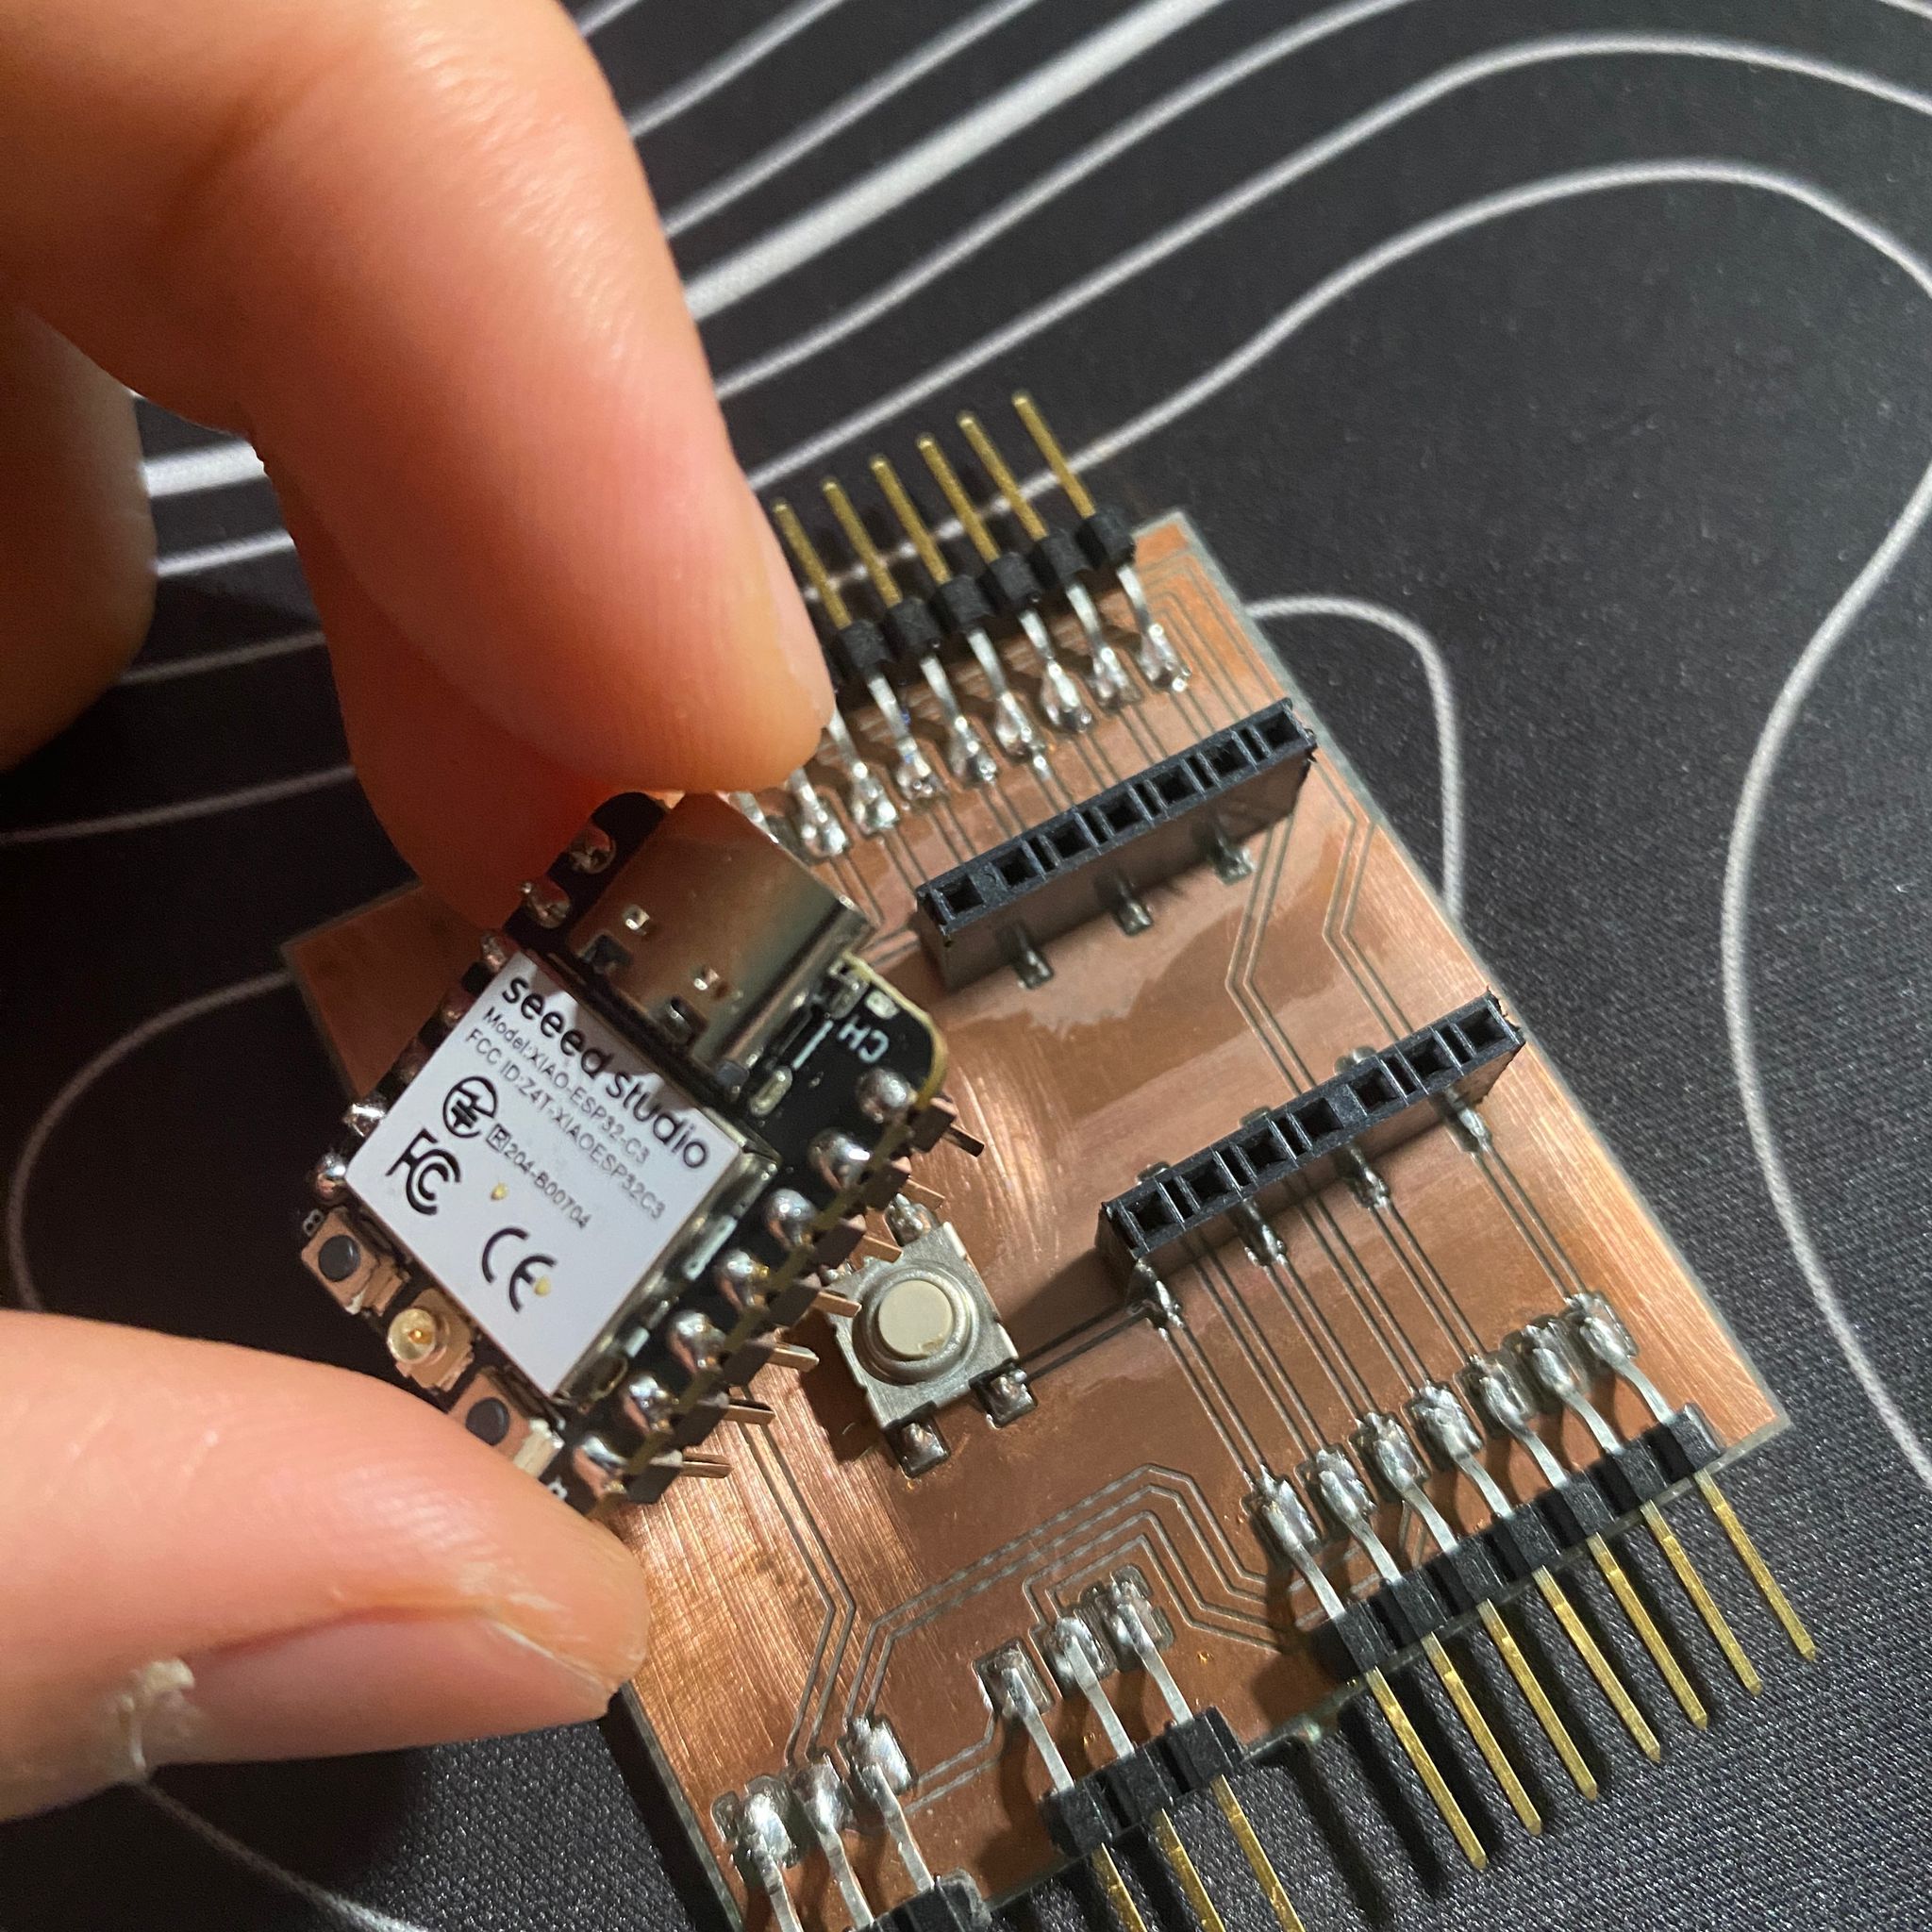
I received a new ESP32-C3 microcontroller from Fab Lab Oulu. I soldered legs for it in oder to connect it to my board.
Software
1. Arduino IDE Configuration
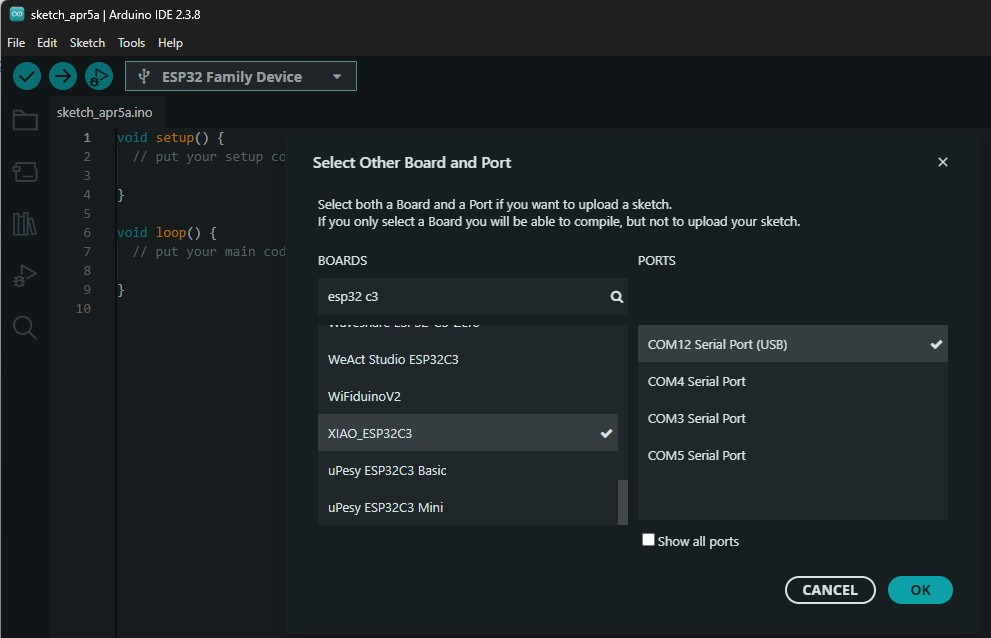
I started by configuring the Arduino IDE to support my ESP32-C3 board:
- Install ESP32 board support via Boards Manager
- Select the correct board: XIAO ESP32C3 (or generic ESP32-C3)
- Choose the appropriate COM port
Board Selection:
2. BLE Scanner App
To communicate with the ESP32-C3 from my phone, I installed a BLE Scanner application. This app allows me to: - Discover nearby BLE devices - Connect to advertising peripherals - Write values to characteristics
Code Implementation
Source
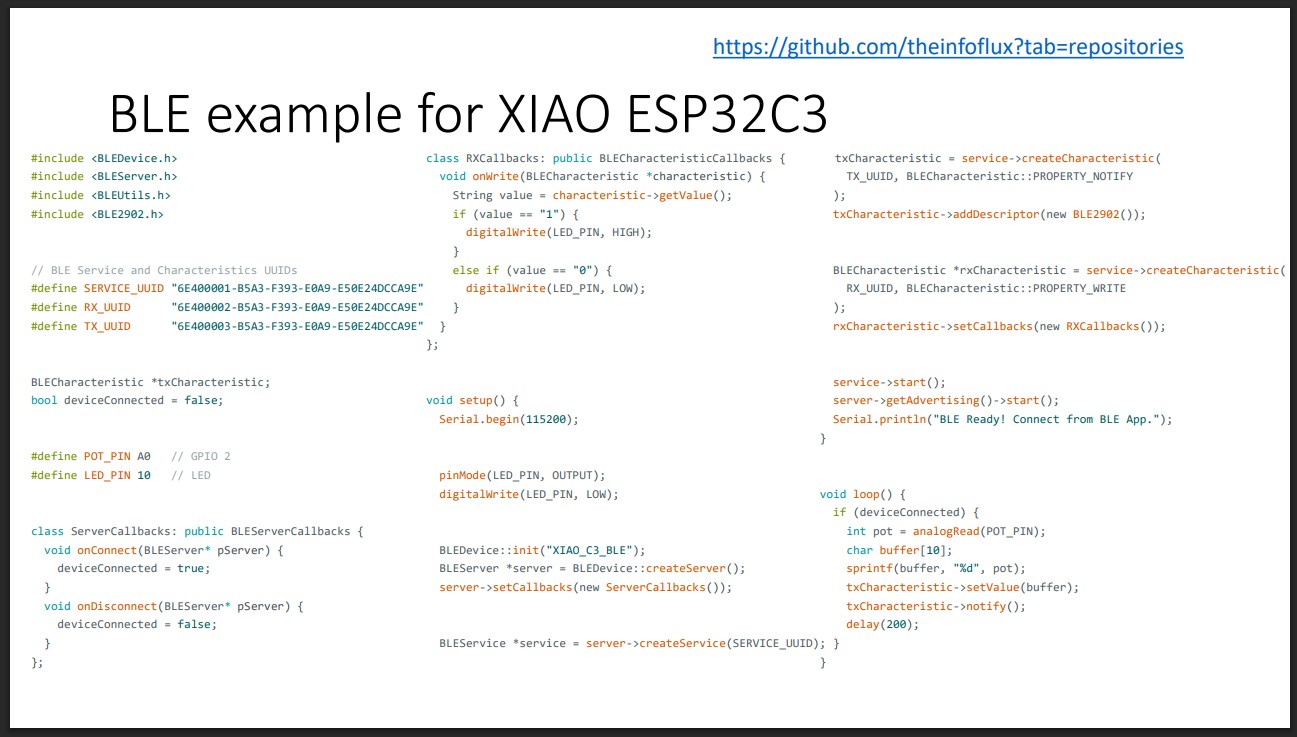
I started with an example from the weekly material on Moodle. The complete code is available on GitHub: ESP32-C3 Bluetooth Communication Example
Example Reference:
Code Fixes Needed
During the setup, the example code from GitHub contained several syntax errors and compatibility issues with the XIAO ESP32-C3 environment. Below are the specific problems I encountered and how I resolved them.
Issue 1: Syntax Errors in BLE Callback Class
The original code had typos and incorrect data types in the BLE callback class, which prevented successful compilation.
Before Fix:
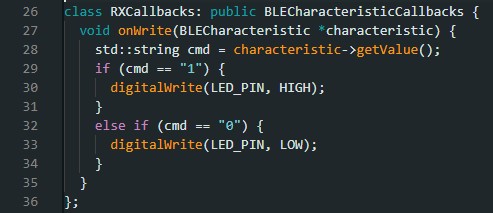
Problems Identified:
| Problem | Explanation |
|---|---|
std::string cmd |
While technically correct, String is preferred for Arduino compatibility. |
After Fix:
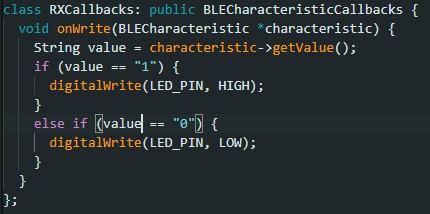
Code Explanation
| Code Section | Purpose |
|---|---|
#include <BLEDevice.h> etc. |
Include BLE libraries |
#define SERVICE_UUID |
Unique identifier for BLE service |
#define RX_UUID |
Characteristic for receiving data (Phone → ESP32) |
#define LED_PIN D6 |
Define LED pin on XIAO ESP32-C3 |
ServerCallbacks class |
Handles connection/disconnection events |
RXCallbacks class |
Handles incoming data - turns LED ON/OFF |
BLEDevice::init("XIAO_C3_BLE") |
Advertise device with this name |
rxCharacteristic->setCallbacks() |
Register callback for incoming data |
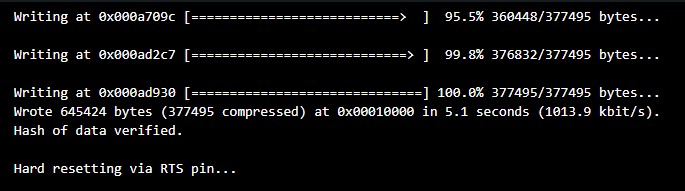
Compilation and Upload
Compiling the Code
The code compiled successfully with no errors.
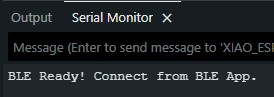
Serial Monitor Output
After uploading, the Serial Monitor displayed:
Connecting via BLE Scanner
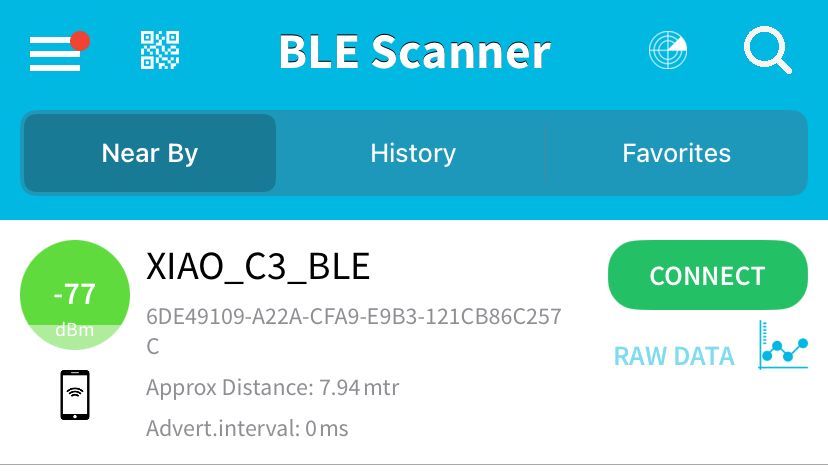
Step 1: Discover the Device
After successfully uploading the code, I opened the BLE Scanner app on my phone. The app detected my microcontroller advertising as XIAO_C3_BLE.
Step 2: Establish Connection
I tapped the connect button next to “XIAO_C3_BLE”. The app established a BLE connection and displayed detailed information about the device.
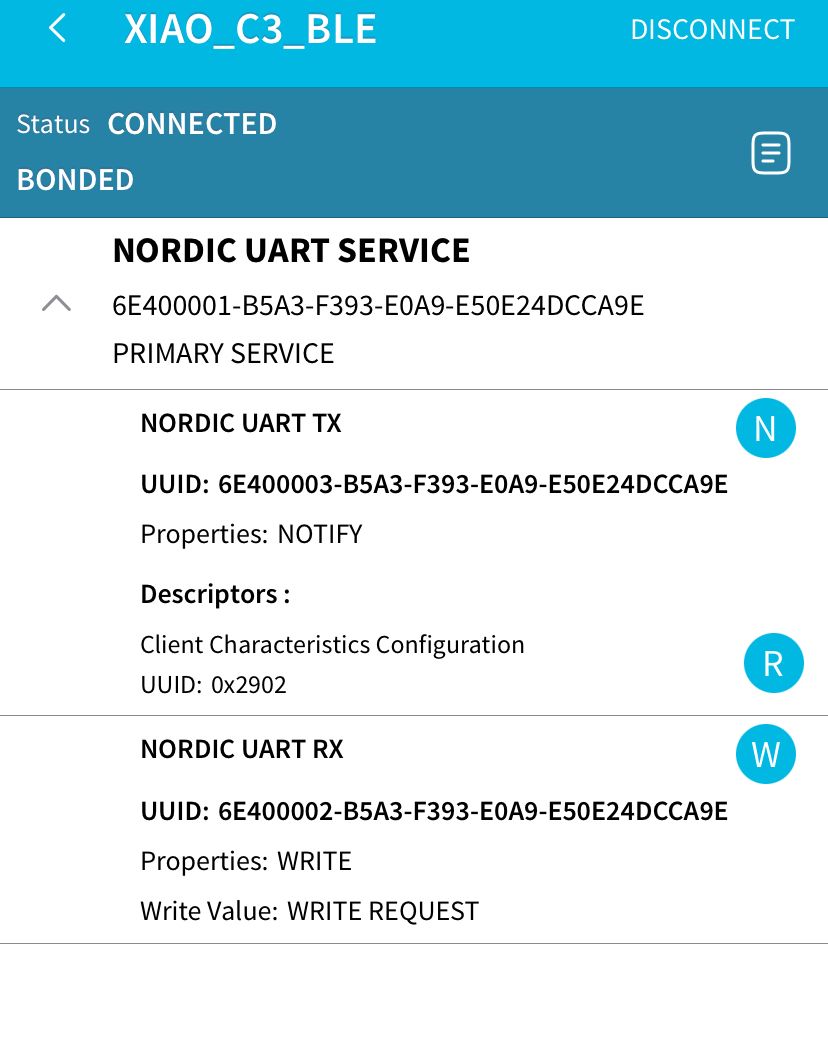
What the app shows:
- Service UUID: 6E400001-B5A3-F393-E0A9-E50E24DCCA9E
- RX Characteristic (Write): Used to send LED commands
Step 3: Send LED Commands
The app provided a text field where I could write values to the RX characteristic.
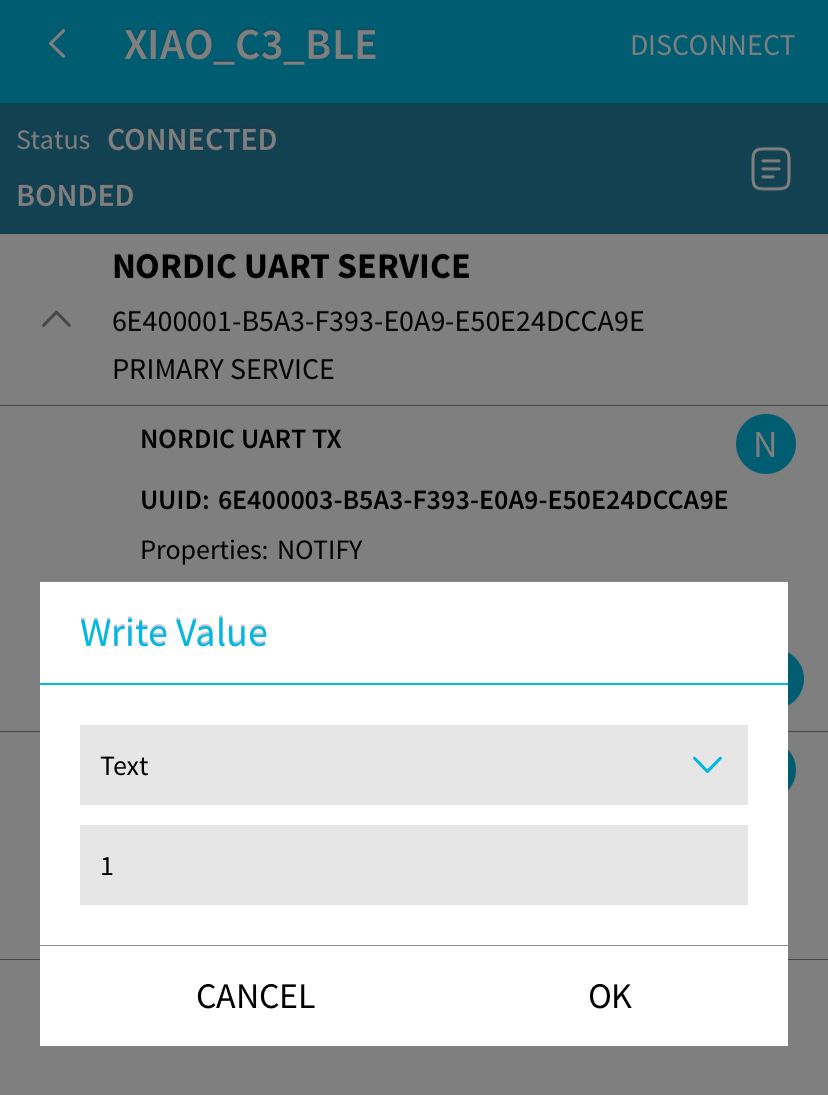
Command protocol:
| Write Value | LED Action |
|---|---|
| “1” | Turns ON |
| “0” | Turns OFF |
Troubleshooting: LED Not Responding
The Problem
After writing values to the BLE characteristic, the LED did not change state. The Serial Monitor showed that values were being received, but the physical LED remained off.
Root Cause
The original example code used 8 as the pin reference. However, on the XIAO ESP32-C3, 8 is not defined. My board uses D6 (GPIO6) for the LED.
Incorrect pin configuration:

The Fix
I modified the code to explicitly define the correct LED pin:
// Before (incorrect)
#define LED_PIN 8

// After (correct)
#define LED_PIN D6
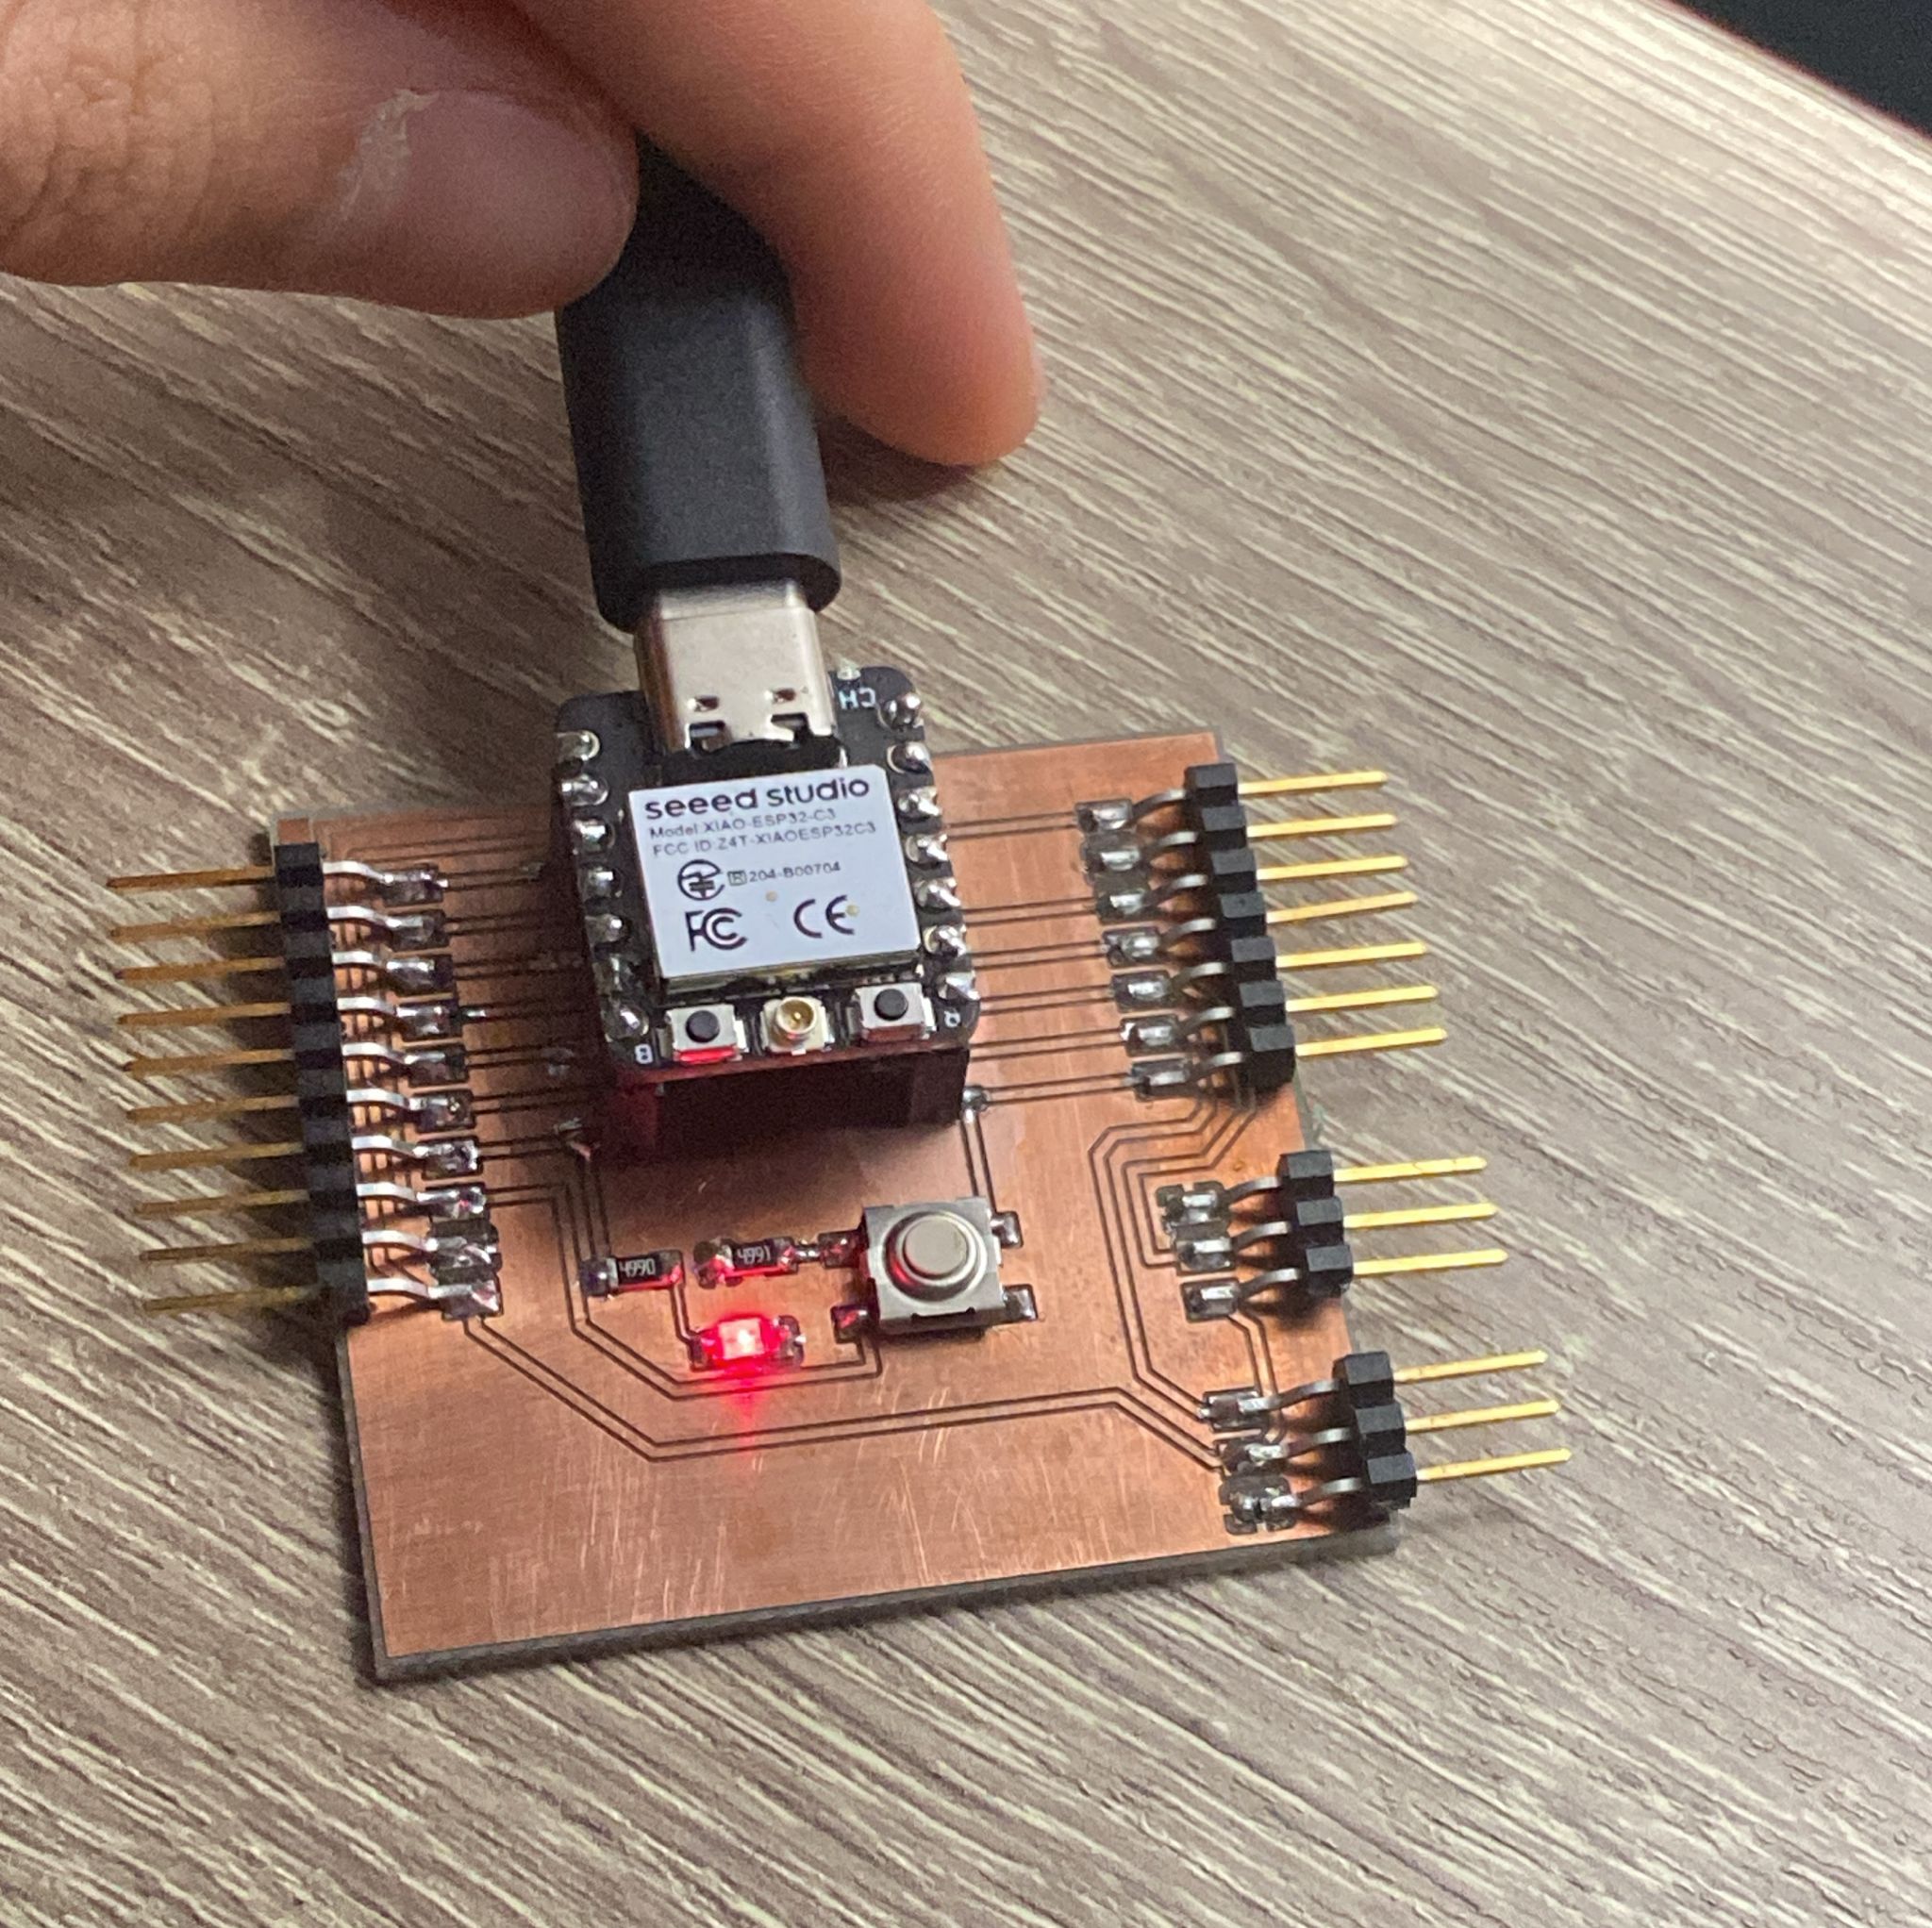
Result
After recompiling, re-uploading, and reconnecting, the LED responded perfectly to the BLE commands.
Testing Results
| Test | Action | Expected Result | Actual Result |
|---|---|---|---|
| 1 | Send “1” via BLE | LED turns ON | Passed |
| 2 | Send “0” via BLE | LED turns OFF | Passed |
| 4 | Disconnect/reconnect | Reconnection successful | Passed |
Extension: BLE Control of NeoPixel LEDs
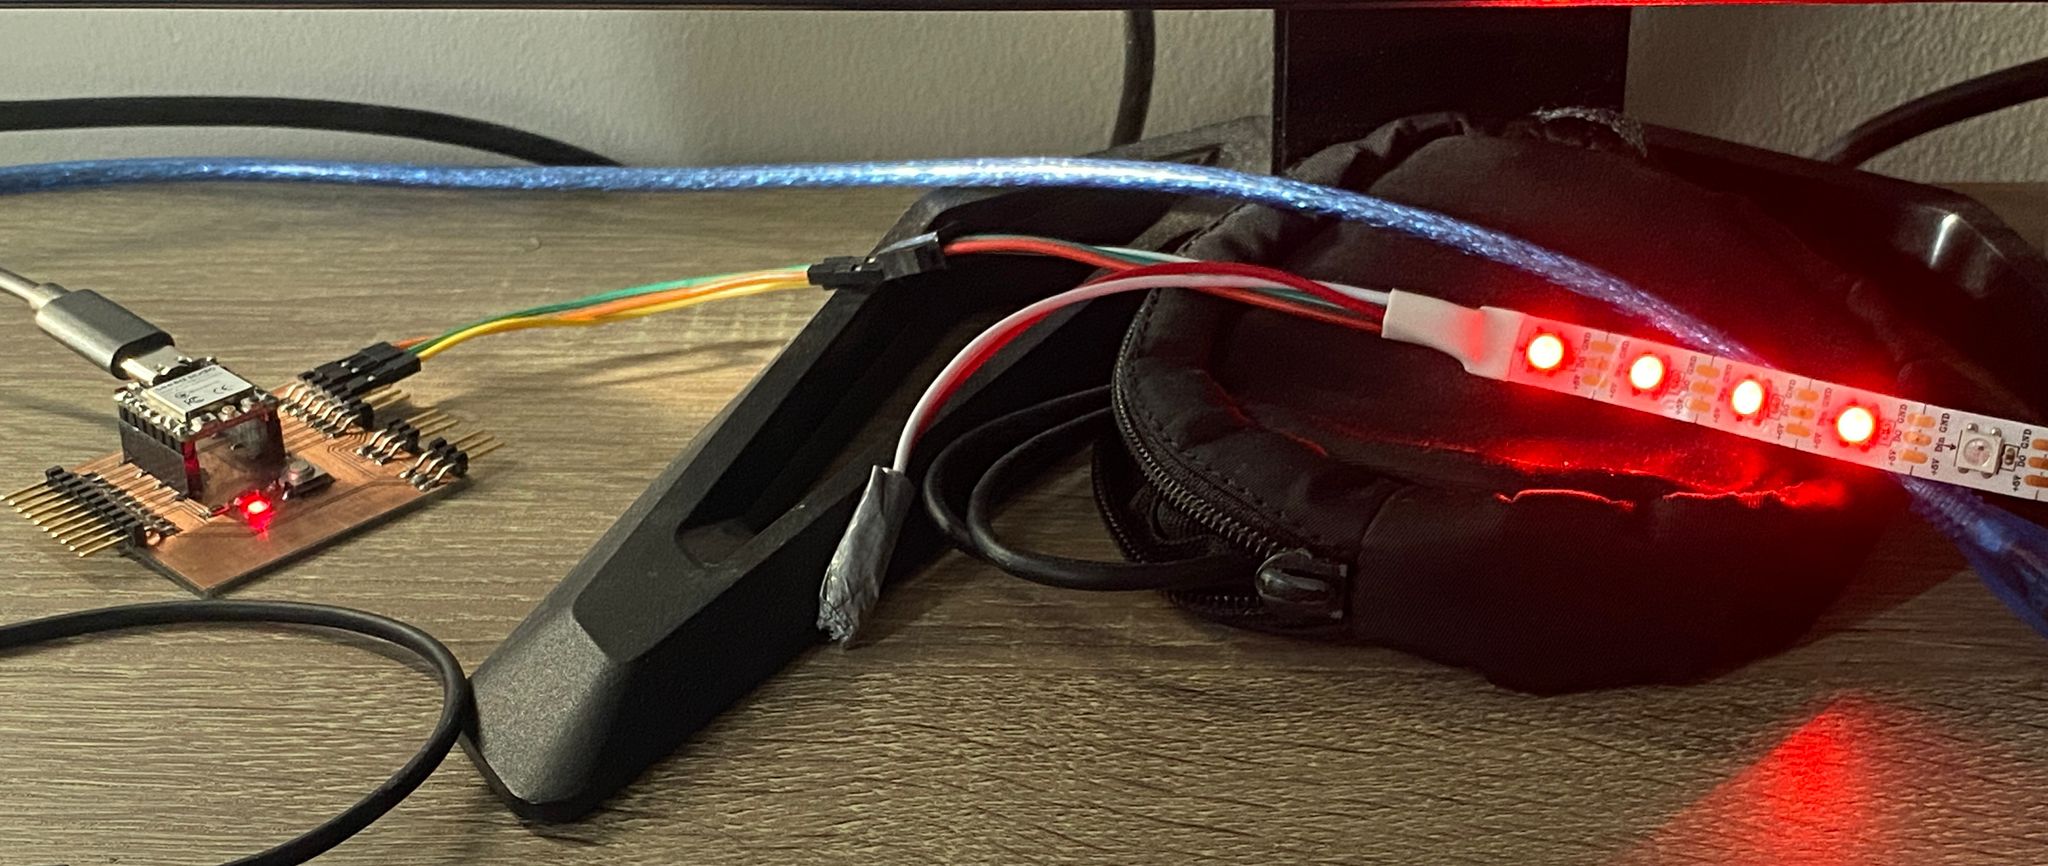
After successfully controlling a single LED via BLE, I extended the project to control multiple NeoPixel LEDs using the same BLE connection. Instead of just ON/OFF, I can now send numbers from my phone to light up a specific number of red LEDs.
How it works:
| BLE Command | Action |
|---|---|
| Send “0” | All LEDs OFF |
| Send “1” | LED 1 ON (red) |
| Send “2” | LEDs 1-2 ON (red) |
| Send “3” | LEDs 1-3 ON (red) |
| Send “4” | LEDs 1-4 ON (red) |
| Send “5” | LEDs 1-5 ON (red) |
Code Added:
#include <Adafruit_NeoPixel.h>

#define NEOPIXEL_PIN D10      // GPIO12 - NeoPixel data pin
#define NUM_PIXELS 5          // Number of NeoPixels

Adafruit_NeoPixel pixel(NUM_PIXELS, NEOPIXEL_PIN, NEO_GRB + NEO_KHZ800);

// Inside RXCallbacks::onWrite():
int ledCount = value.toInt();
if (ledCount > NUM_PIXELS) ledCount = NUM_PIXELS;
if (ledCount < 0) ledCount = 0;

// Turn all OFF first
for(int i = 0; i < NUM_PIXELS; i++) {
  pixel.setPixelColor(i, pixel.Color(0, 0, 0));
}
// Turn ON requested number in RED
for(int i = 0; i < ledCount; i++) {
  pixel.setPixelColor(i, pixel.Color(255, 0, 0));
}
pixel.show();
Testing Result:
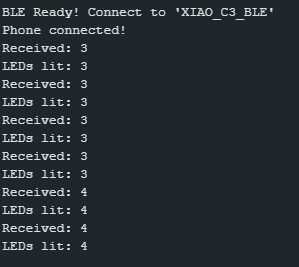
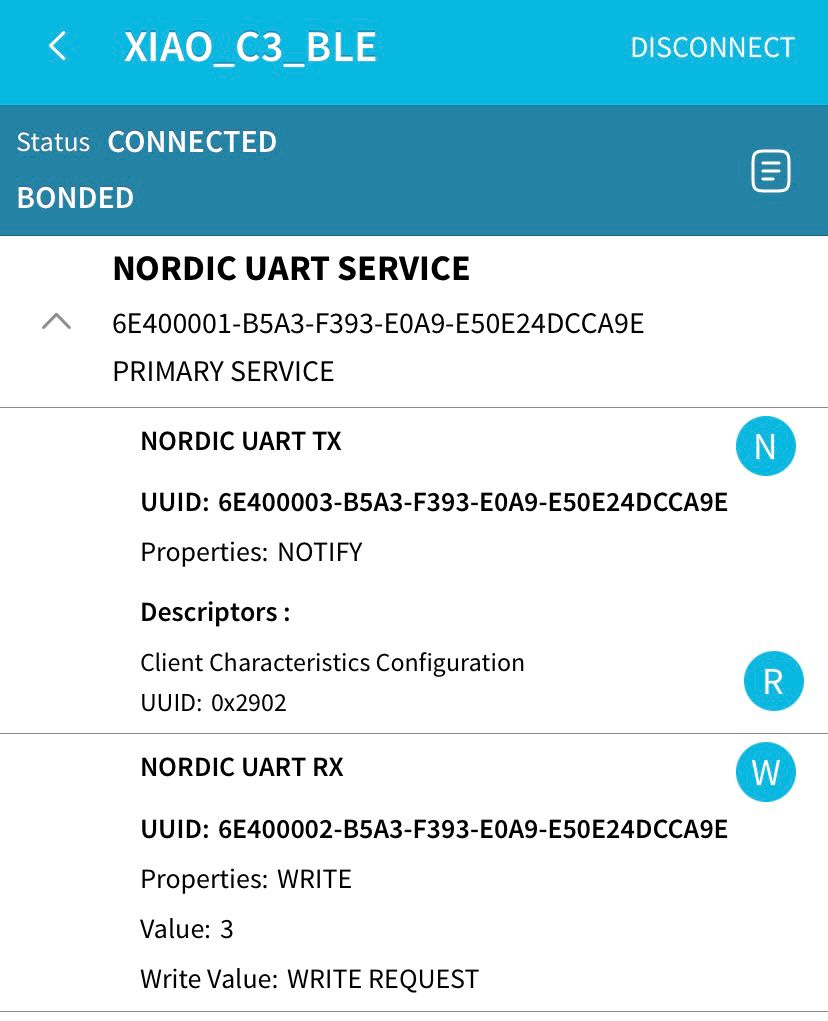
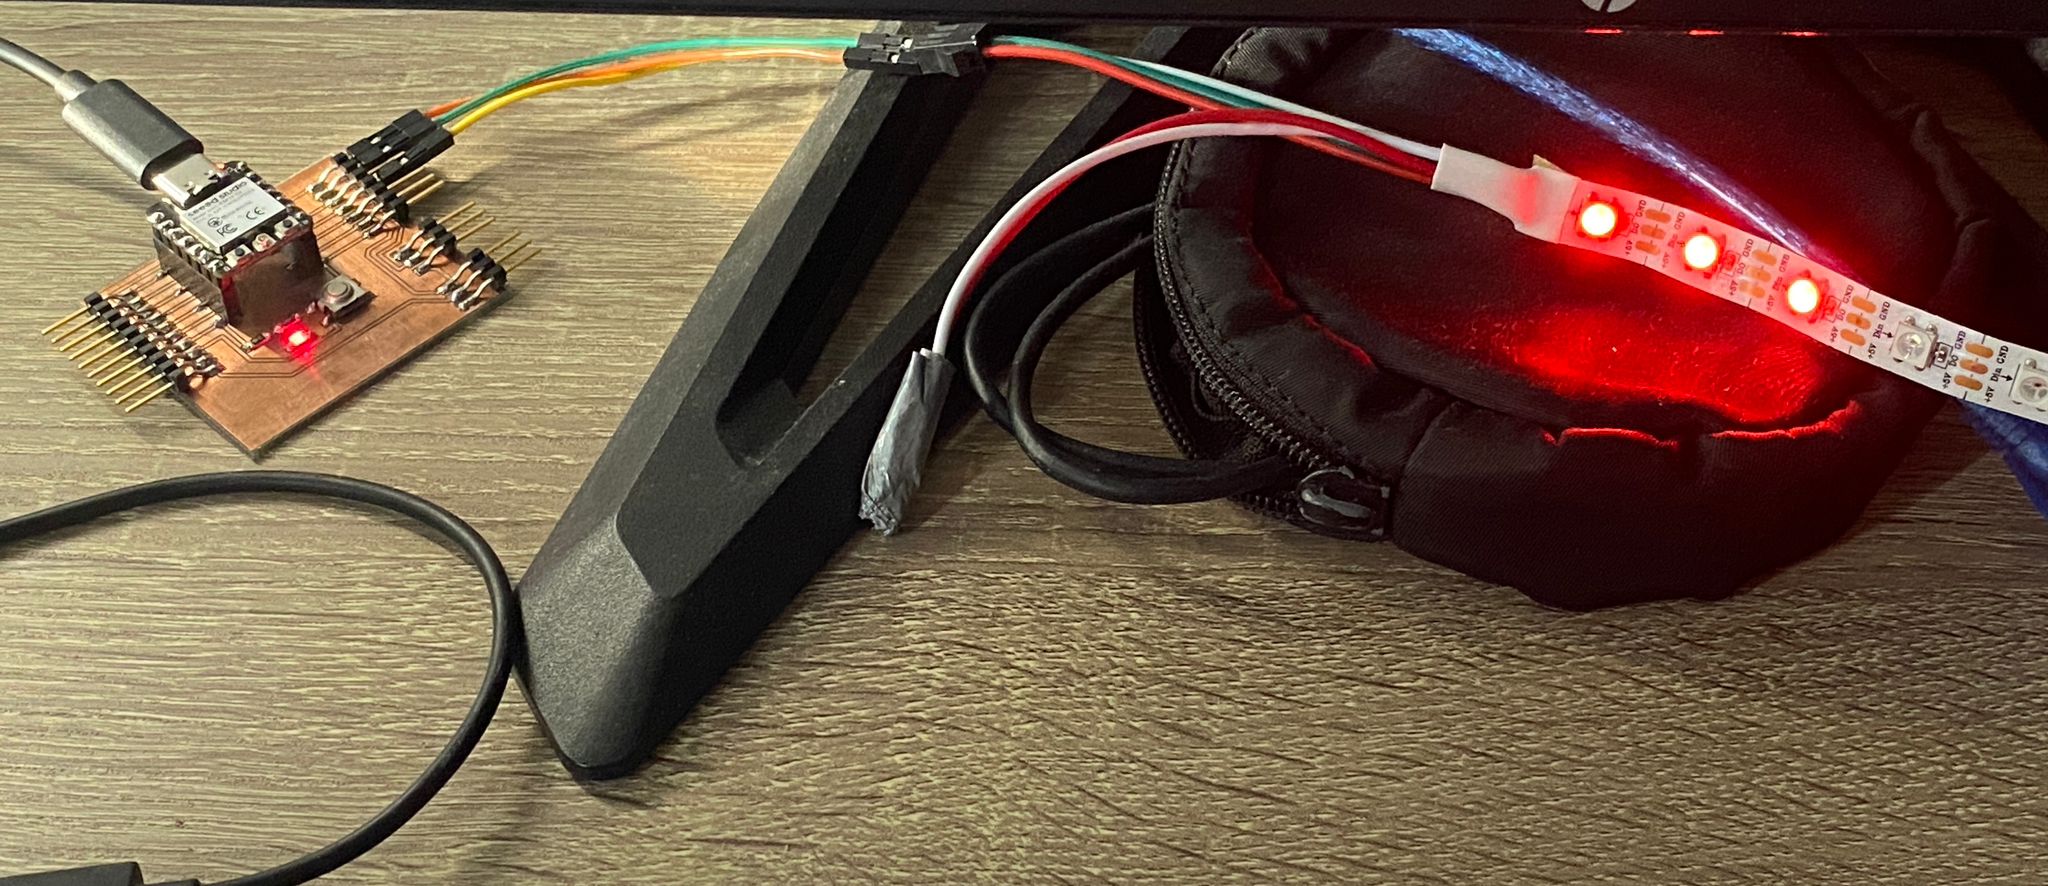
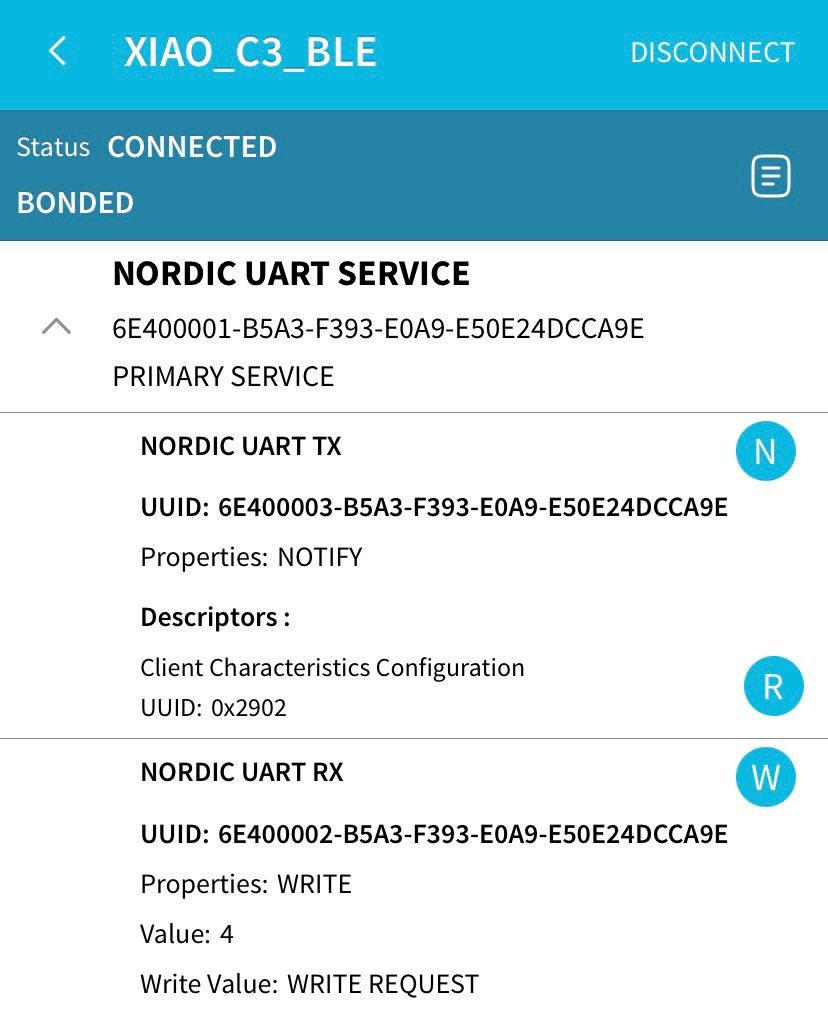
When I sent “3” from the BLE Scanner app, the first 3 NeoPixel LEDs turned red. When I sent “4”, the first 4 NeoPixel LEDs turned red. The ESP32 responded instantly with no noticeable delay.
What I learned from this extension:
| Concept | What I Learned |
|---|---|
| Data Parsing | Converting BLE string input to integer for LED count |
| Scalability | The same BLE principle works for controlling any number of LEDs |
Key Learnings
| Concept | What I Learned |
|---|---|
| BLE Architecture | BLE uses Service/Characteristic hierarchy with unique UUID identifiers |
| RX Characteristic | Write property allows phone to send commands to ESP32 |
| Callback-Driven Programming | onWrite() handles incoming data automatically without polling |
| Nordic UART Service (NUS) | Standard UUIDs make ESP32 compatible with existing BLE apps |
| Serial Debugging | Serial Monitor is essential for confirming data reception |
Files
| File | Description |
|---|---|
| BLE_connection.ino | BLE LED control |
| BLE_Neopixel.ino | BLE NeoPixel control |
Reflection
This assignment gave me practical experience with Bluetooth Low Energy communication on the ESP32-C3 platform. Key takeaways:
-
Simple Control: The system successfully receives “1” and “0” commands from my phone to turn an LED ON and OFF wirelessly.
-
BLE Architecture Understanding: Learning about Services, Characteristics, and UUIDs was essential. The RX characteristic with WRITE property is what enables phone-to-ESP32 communication.
-
Callback-Based Programming: BLE uses asynchronous callbacks (
onWrite()) rather than polling loops. This is efficient because the ESP32 can sleep or do other tasks while waiting for commands. -
Serial Debugging: Serial Monitor was invaluable for confirming that data was being received correctly before debugging the LED hardware.
The combination of the group assignment (ESP-NOW for device-to-device) and individual assignment (BLE for phone integration) gave me a comprehensive understanding of wireless communication options for embedded systems. While ESP-NOW is better for device networks, BLE is ideal for smartphone integration and remote control applications.